Looking for some GoPro photo tips for shooting animals? Perfect. In this post, you’ll learn 12 tips for shooting great photos of animals with your GoPro.
A GoPro is an ideal camera for animal photography: it’s small and tough inside its waterproof case. That combo makes it versatile (you can easily take it to remote and rugged locations) and less intimidating to the animals.
In this post, I’ll share 12 GoPro photo tips for getting fantastic animal shots with your GoPro. Here are more GoPro photography tips for other settings.
12 GoPro Photo Tips: How to Shoot Animals
Here are the twelve tips you’ll learn about in this post.
- Use an extend pole
- Mount your tripod close to the ground
- Turn your GoPro upside down
- Use anti-fog inserts
- Keep your lens clean
- Shoot in time lapse mode
- Shoot in Protune flat
- Compose your shot
- Use a macro lens
- Use a variety of mounts
- Use a dome port
- Get a selfie
Okay – let’s dig into the details!
1. Use an Extend Pole
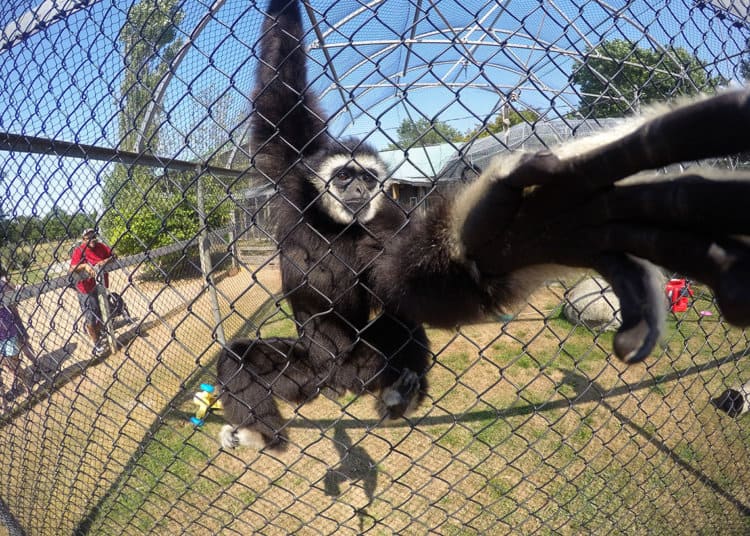
![]() The biggest difference we’ve seen in our animal photography since getting the GoPro is how much closer we can get to them.
The biggest difference we’ve seen in our animal photography since getting the GoPro is how much closer we can get to them.
The extend pole, plus an arm’s length gets the camera about 6 feet closer. That can make a huge difference.
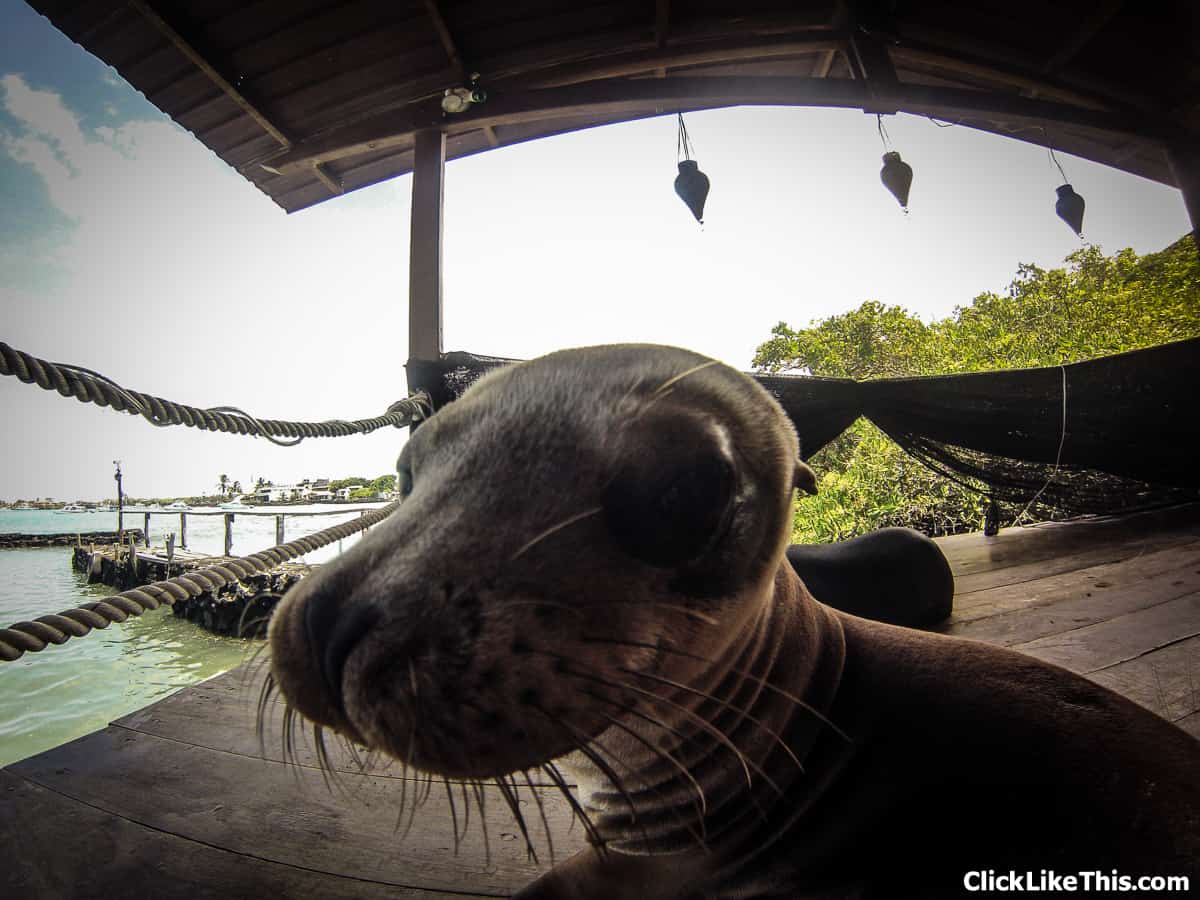
It also puts the animals at ease because there is more distance between us and them. They are not afraid of the GoPro. It makes them really curious, they want to smell it, and sometimes, taste it.
A Galapagos sea lion sniffing around.
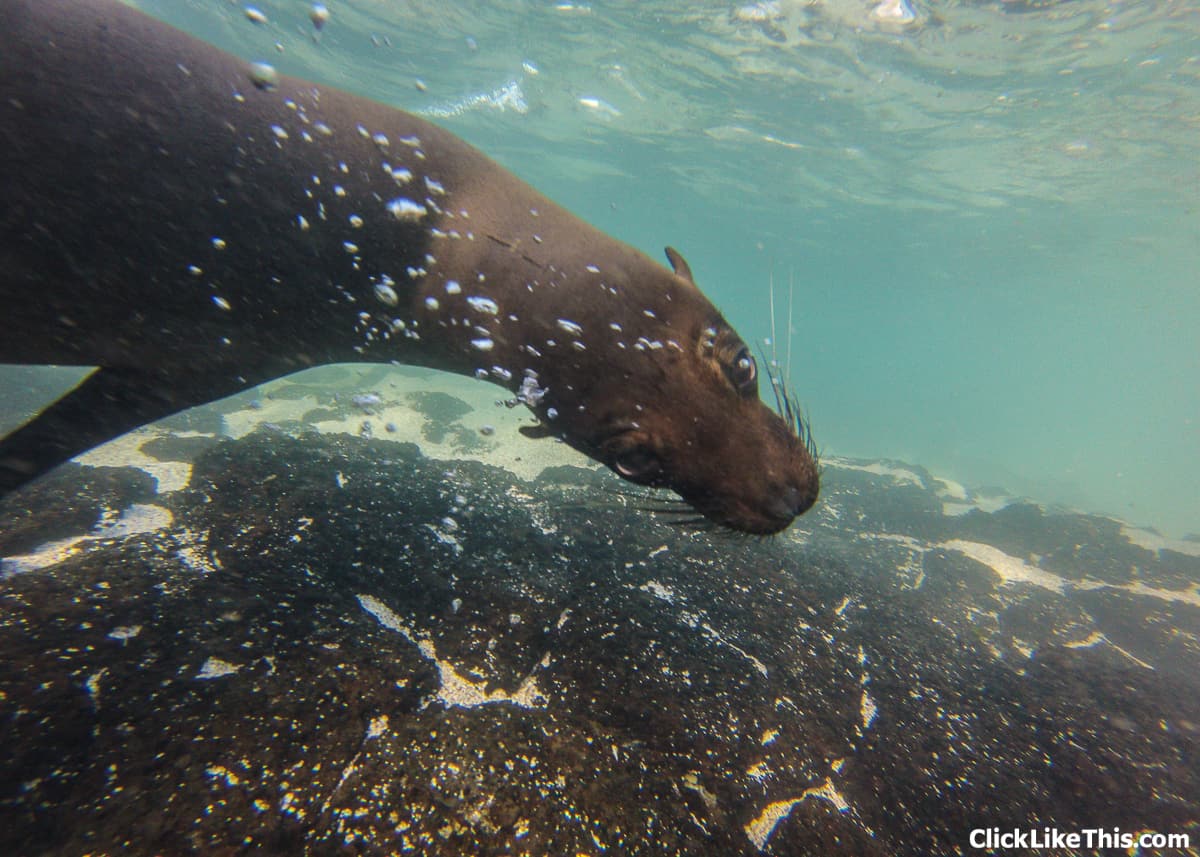
Another sea lion checking out the GoPro underwater.
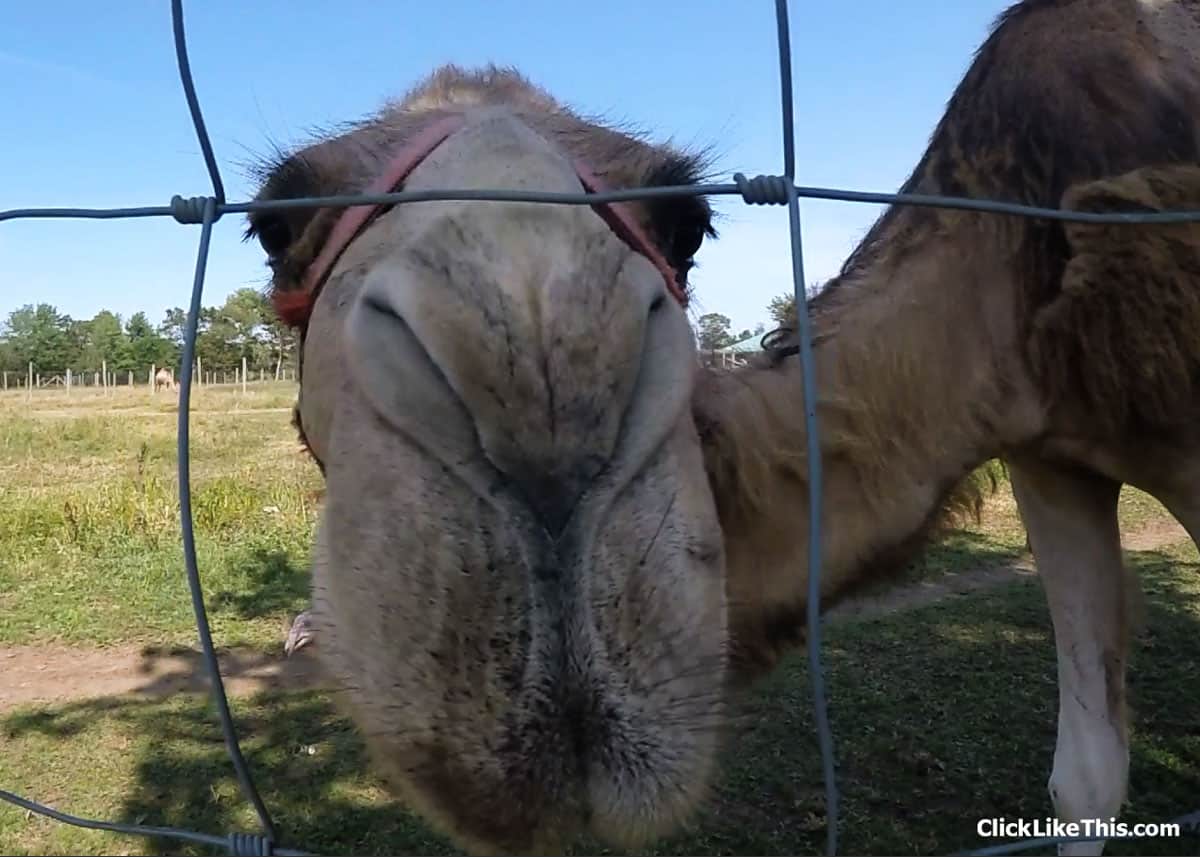
A camel at the local zoo coming in for a taste test.

It’s fun to watch the animals trying to figure out what the camera is. And it’s exciting to see the photos of them doing that.
Remember to be kind to the animals by not putting the camera in their face. Always extend the camera to a comfortable distance, and let them come to it.
Or you can mount your camera to a GoPro dive mask for a true POV experience.
2. Use a Tripod Close to the Ground
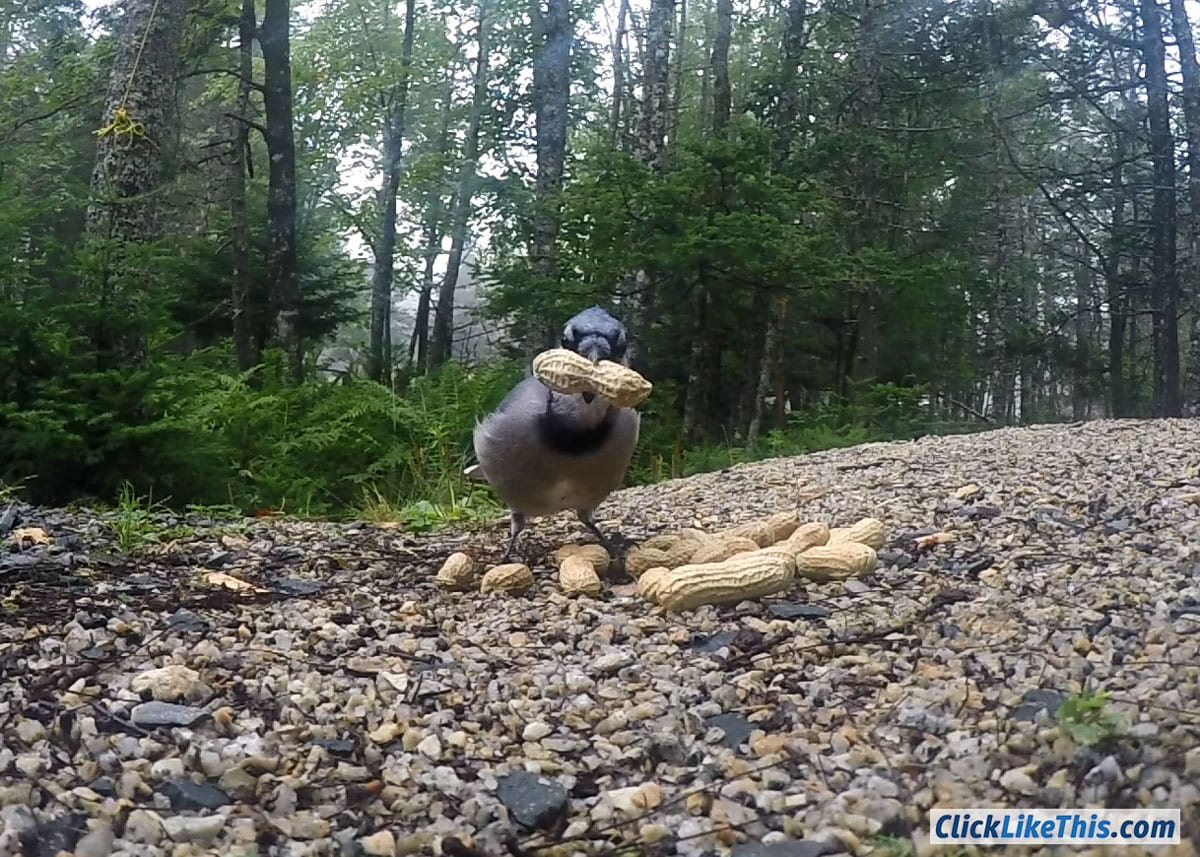
![]() By using a tripod close to the ground, you can put treats down for the animals, step back and see what happens.
By using a tripod close to the ground, you can put treats down for the animals, step back and see what happens.
We love the Gorillapod and the Pedco II UltraPod Tripod (pictured below).
We had a blast with this trick while camping this past summer. (And Mr Blue Jay loved it too.)
Please be careful of what treats you feed the animals, some treats have ingredients that could be harmful.
3. Turn The GoPro Upside-down
This might sound weird but it’s a really helpful tip.
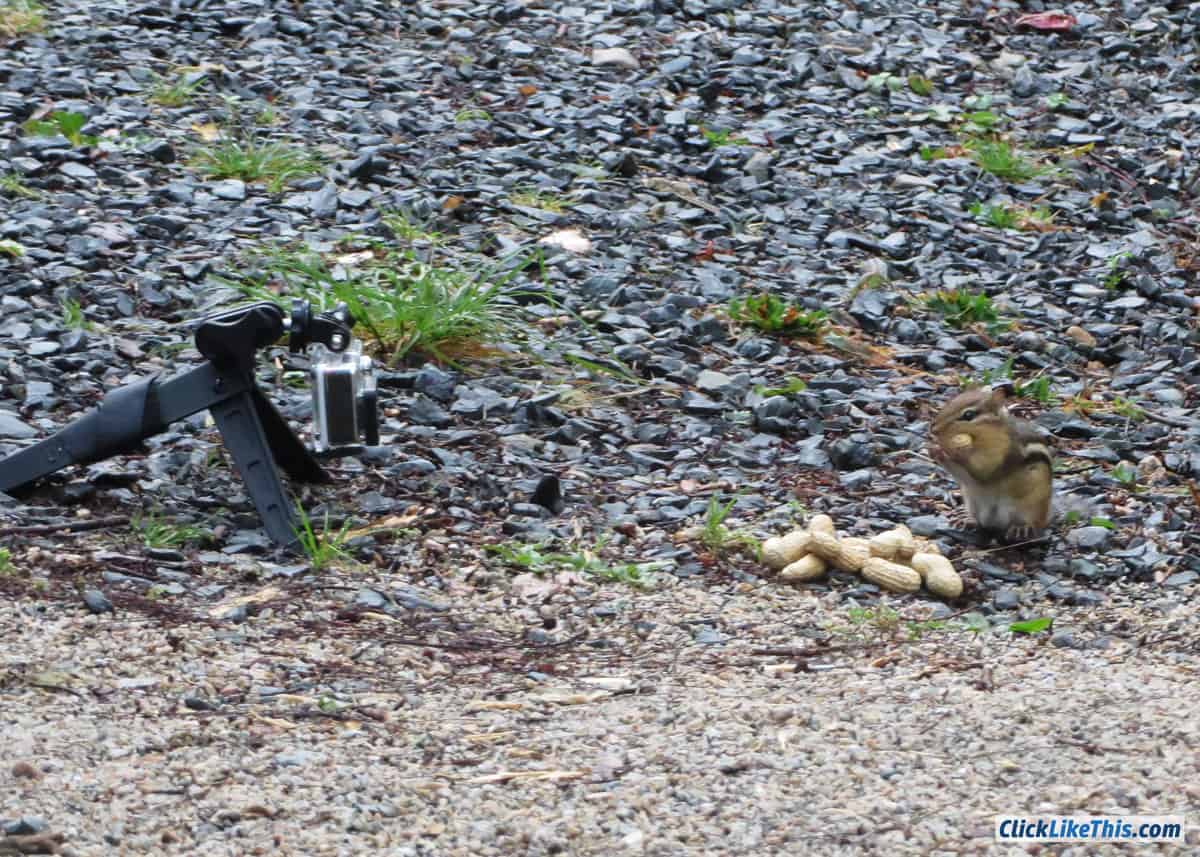
If the GoPro is set up on a tripod close to the ground (like in the above photo) and you want to include more of the foreground bringing the action closer to the camera.
Turning the camera upside down on the tripod will get it closer to the ground. Once you have your footage you can simply flip it in your editing software, as we did.
Here is the setup. As you can see the GoPro is upside down.
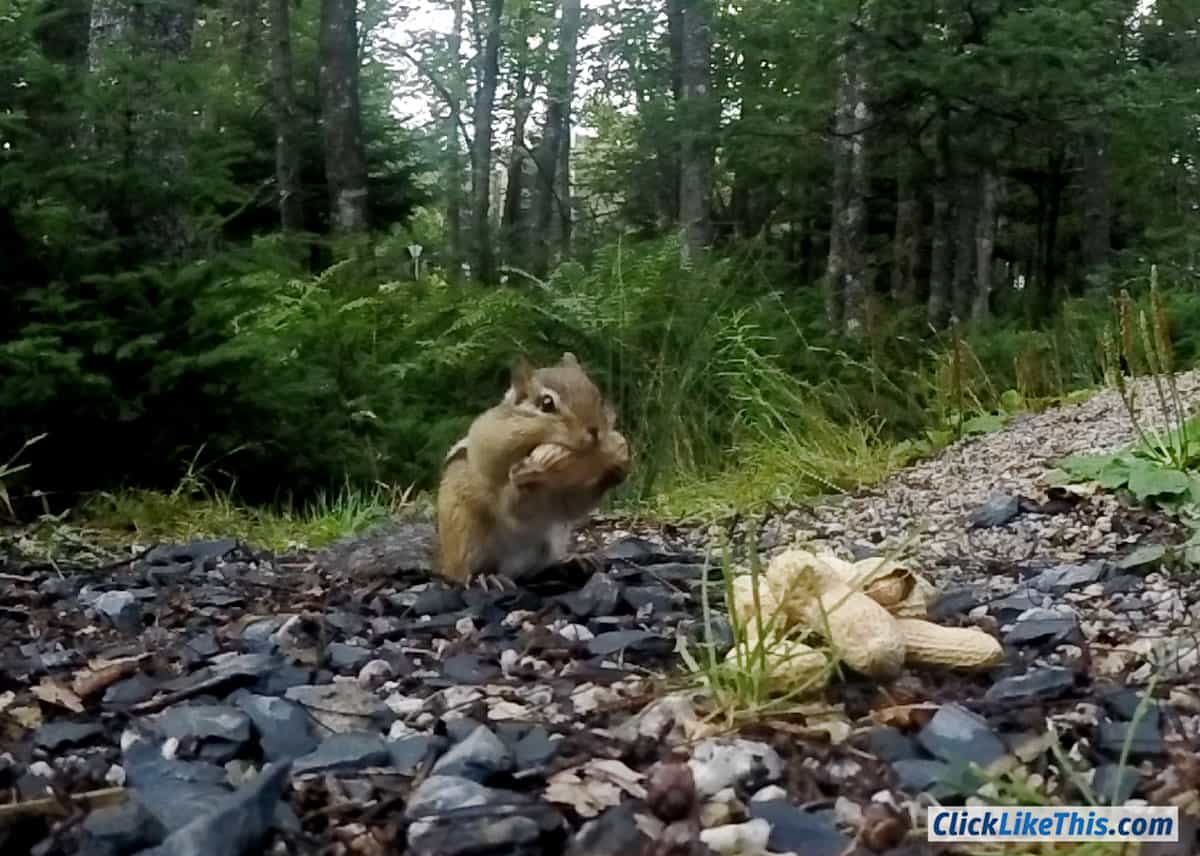
And here is how the shot turned out. It looks super cute and the perspective is great.
This tip also comes in handy when using the GoPro on the end of an extend pole. If you are fishing, canoeing, or hiking and you see some cool underwater activity.
Turning the camera upside-down on the end of the pole gives you a better angle for shooting, and feels a little less awkward while filming.
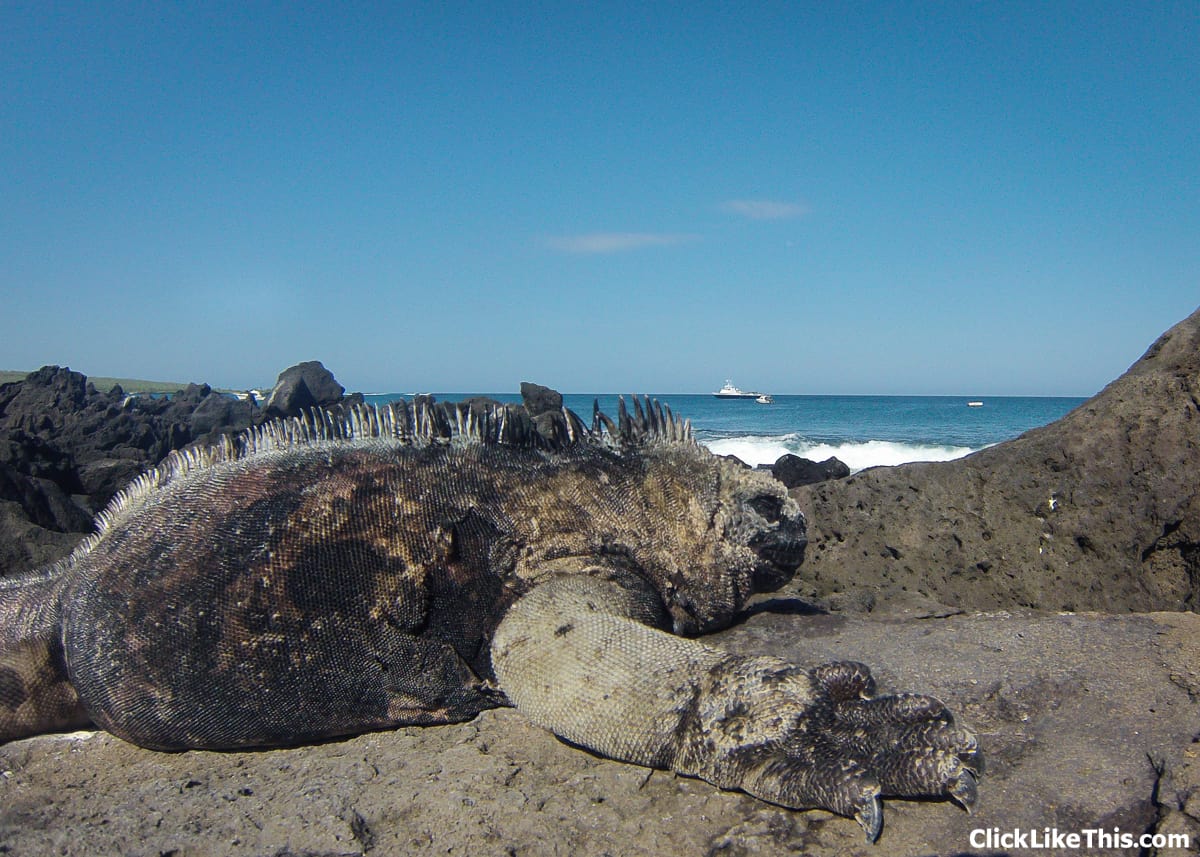
It also makes shooting in shallow water easier, as we see in this next shot of a Galapagos marine iguana.

You can flip things in-camera so it looks right way up, but that takes some fussing and we find it easier to flip things around while editing. Fiddling around with in-camera stuff could also cause you to miss the action.
4. Use Anti-Fog Inserts to Eliminate Lens Fog
![]() Anti-fog inserts (moisture absorbent strips) will soak up any moisture that condenses inside your waterproof housing. They are small and reusable. You just put them in the oven for a few minutes to dry them out, and reuse.
Anti-fog inserts (moisture absorbent strips) will soak up any moisture that condenses inside your waterproof housing. They are small and reusable. You just put them in the oven for a few minutes to dry them out, and reuse.
Without them you could end up with ruined footage. When moisture condenses inside the waterproof housing it will leave a blurry ring around your images.
As the temperature changes during filming (when you or the camera goes from cool to warm, or dry to moist environments) the moisture absorbent strips will do their job and your images will remain clear.
Here’s what you’re trying to avoid (and some more tips on how to fix it).
5. Keep the Lens Area Clean
![]() This sounds like a no-brainer but it’s so easy to forget!
This sounds like a no-brainer but it’s so easy to forget!
When you are excited about the great footage you’re getting you might not think to check for water drops clinging to the lens. If you forget, those water drops will ruin your remaining shots.
Using a product like Rain-X or GoClear can save a lot of frustration. They repel water, so when you bring your camera up out of the stream after shooting that cool turtle, the water will slide off your lens and you’ll be able to get clear shots of the huge fish your buddy just landed.
6. Shoot in Time Lapse Mode
Having your GoPro set to time lapse means you won’t miss the action.
Animals are interesting subjects, but not every animal shot is interesting. Animals move fast and it’s super easy to miss a key moment. Having your camera set to time-lapse means that you’ll have a lot of photos to choose from. You can take your pick while editing. Publish or share only the best.
You can also use a series of time lapse shots to make a gif of your favorite action sequence.
7. Shoot in Protune Flat
The GoPro is a pretty easy camera to use. You don’t have to worry much about focus, shutter speed or ISO because it’s already set, or there are only a couple of options to choose from. And you’ll probably do the majority of your shooting in natural light.
With that in mind, there is something you can do to get even better color results. Try shooting in Protune Flat. This mode is a higher data capture and gets more detail in the shadows and highlights. This means that you’ll get richer color and have more options when it comes time to edit.
Here’s a great example of the difference Protune flat makes. I shot these next three shots one after the other, this first shot in the default GoPro color. Notice how much better the second shot, taken in Protune flat is. It makes much better use of the light (these were shot in natural light).
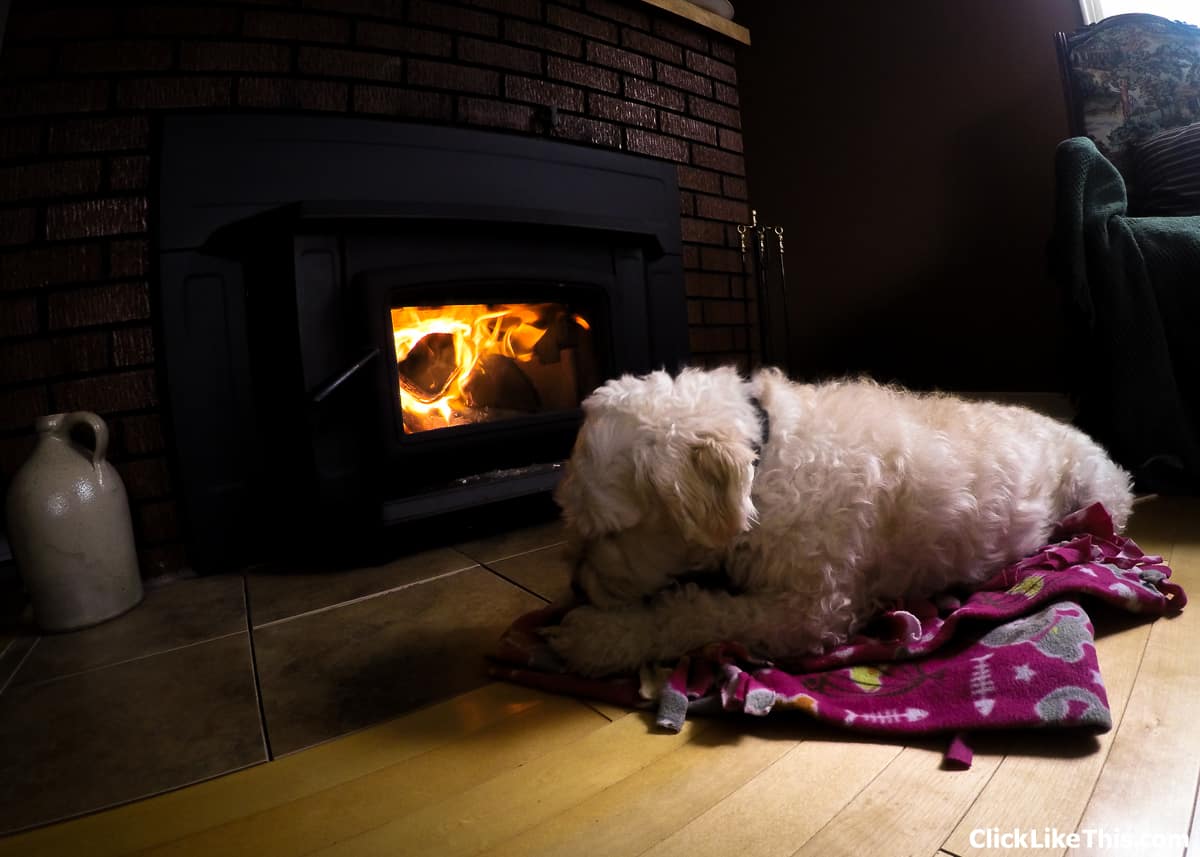
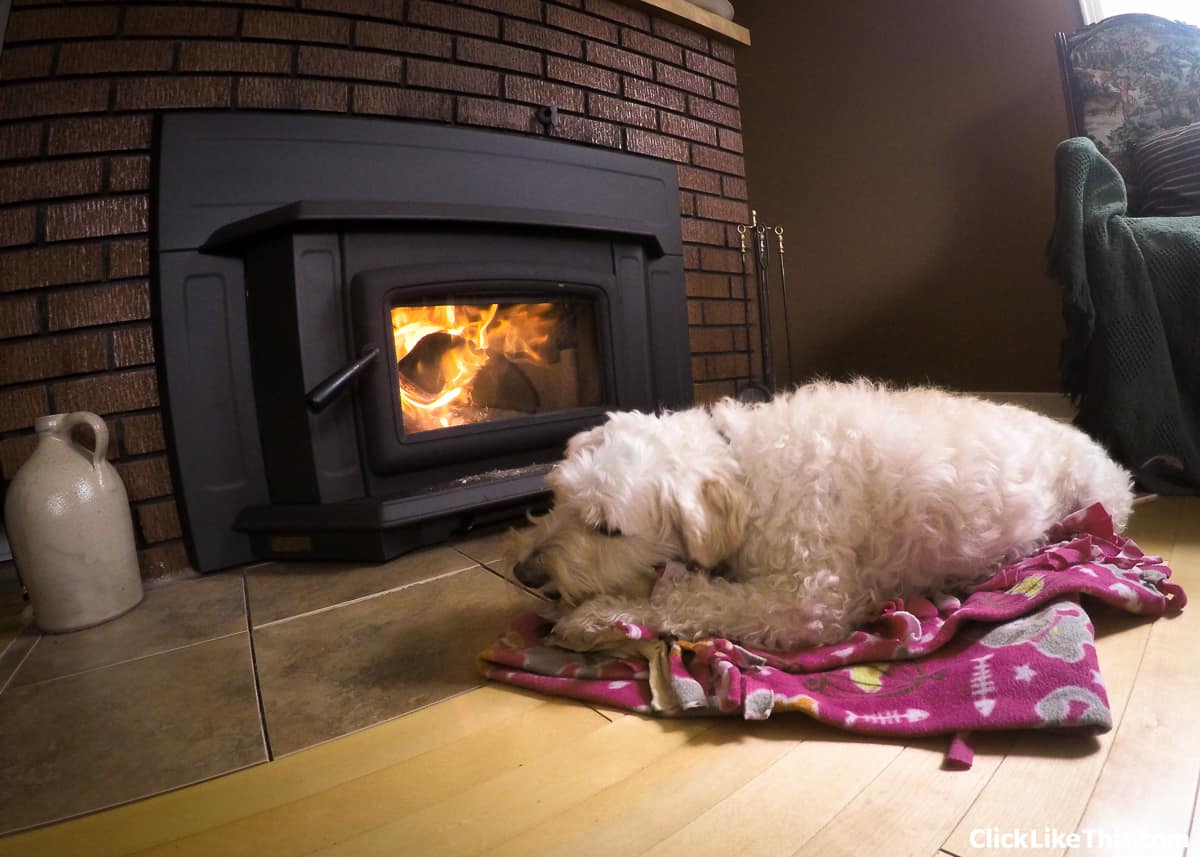
I love the way this shot shows the window light on the right and the firelight on the left.
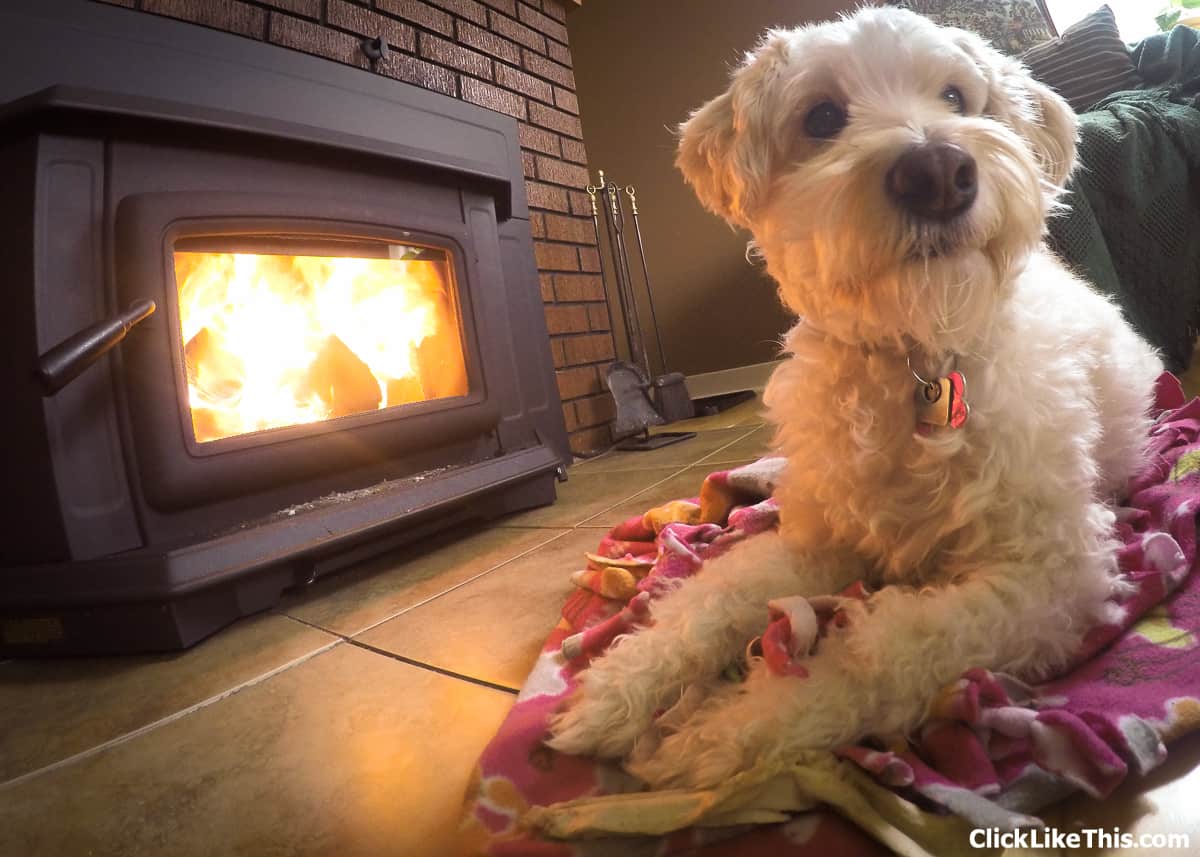
GoPro color is the default mode on your GoPro and it does a great job, but Protune flat is even better, and it’s an easy download.
8. Compose Your Shot
Unless you’re just out for a day of exploration and up for capturing whatever animals happen by (which is really fun) you’ll probably want to give thought to composure.
Connecting with your GoPro through your tablet or iPhone is a great way to compose your shots. That’s what I did for the above photo, my GoPro was on a Gorillapod and I was using my tablet as a screen.
The older GoPro cameras don’t come with an LCD screen (only Hero4 Silver and Hero5 Black have them) and none of them have viewfinders, so composure can be a little tricky.
Thankfully you’re working with a really wide field of view, but sometimes you’ll want to make sure you’re shot captures your key elements. It’s not always as easy as cropping while editing at those times, using your handheld as a screen for your GoPro can really help.
Connect things up before heading out for your shoot, and don’t forget to turn up the brightness on the screen of your handheld.
9. Use a Macro Lens
![]() Macro lenses help you get close-up images with your GoPro.
Macro lenses help you get close-up images with your GoPro.
A GoPro has a really wide field of view, which is awesome, but things start to get fuzzy when you get within 12 inches of the lens. So if you want to get nice and close to your animal subjects, you’re going to need a macro lens. This type of lens also draws more attention to your subject because the objects farther away become blurry.
You can also stack multiple macro lenses to get even closer.
Read more: An Introduction to GoPro Macro Photography
10. Use a Variety of Mounts
Mounts and tripods (see below for tripod suggestions) for animal photography.
- A head mount
- A suction mount
- A mouth mount
- A handheld— mount (used with a macro lens for butterflies and insects)
- GoPro dog harness
Some ideas for getting great animal footage with your GoPro: When you are “out of the picture” the animals will feel more comfortable and you’ll get better footage. This is especially true with shy animals. Try these next ideas by setting up a mount and leaving the animals alone with the GoPro.
Mount it to…
- A bird feeder (don’t forget the macro lens)
- Near a birds nest
- To the side of a tree where you know animals hang out. You can set up a spot by baiting animals with carrots or apples. Leave a small pile in a quiet place, pretty soon you’ll have animals coming.
- On the side of a bird bath, or at the bottom of it
- On your head, or held in your teeth while playing with your pet
- On the ground in the middle of scattered birdseed
- At the bottom of your pets food/water dish
- At the bottom of your horses bucket of oats
- Inside your bird, rabbit, snake… cage, and don’t forget your fish tank
11. Use a Dome Port
![]() Using your GoPro with a dome port will help you get half underwater animal shots.
Using your GoPro with a dome port will help you get half underwater animal shots.
The dome port pushes the water line away from your lens giving you a larger field of view and fixes magnification problems.
Being able to show what is going on above and below the water is a super way to show habitat, tell a story, and add drama to your animal photography.
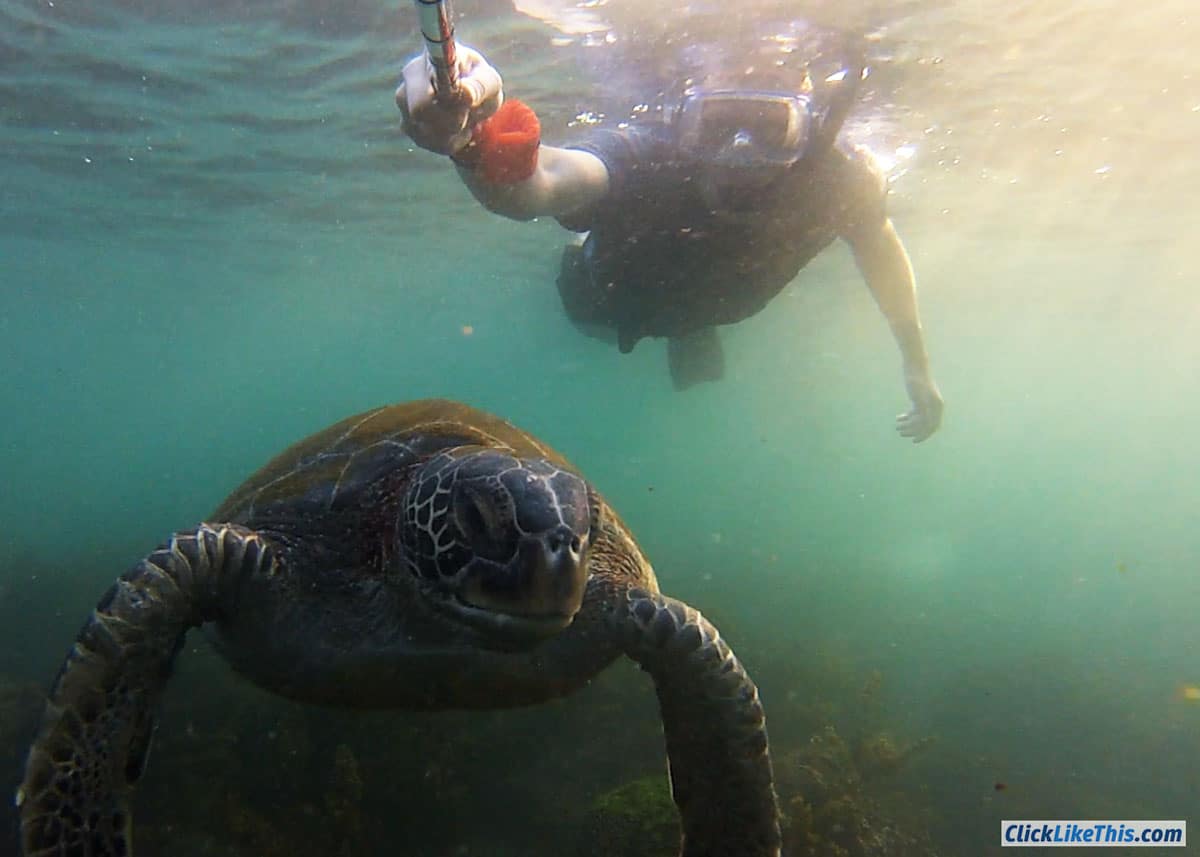
12. Get a Selfie
![]() It can be hard to remember to get in on the action when photographing animals. You might be so caught up with getting footage of your subject that you forget how easy the GoPro makes getting great selfies.
It can be hard to remember to get in on the action when photographing animals. You might be so caught up with getting footage of your subject that you forget how easy the GoPro makes getting great selfies.
Have your GoPro flipped around to face you on an extend pole, then stand or swim near your subject. With your camera set to video or time lapse you’ll get exciting footage with the animal.
A photo with you and the animal can be so much more captivating than without.
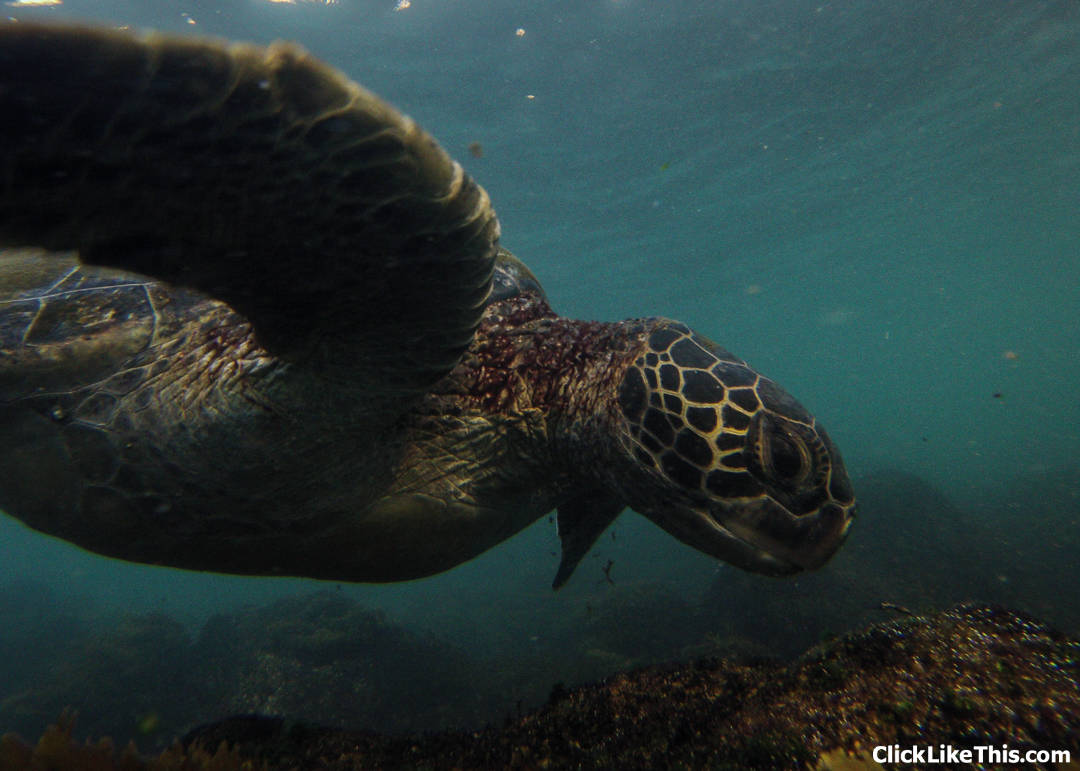
Here is a great example of Bryan and a sea turtle. The first shot is wonderful, I love how cool sea turtles are. But the second photo is more exciting!
A couple of years ago we flew from Ecuador to Florida, and then drove from Orlando to Canada with my parents.
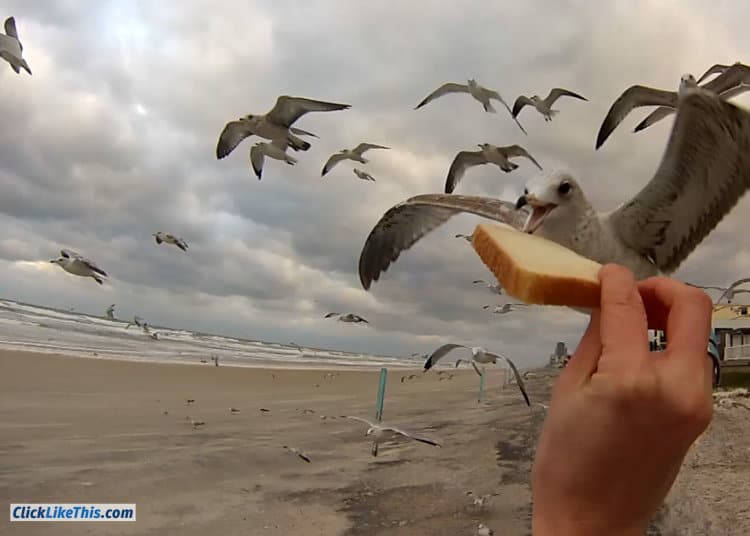
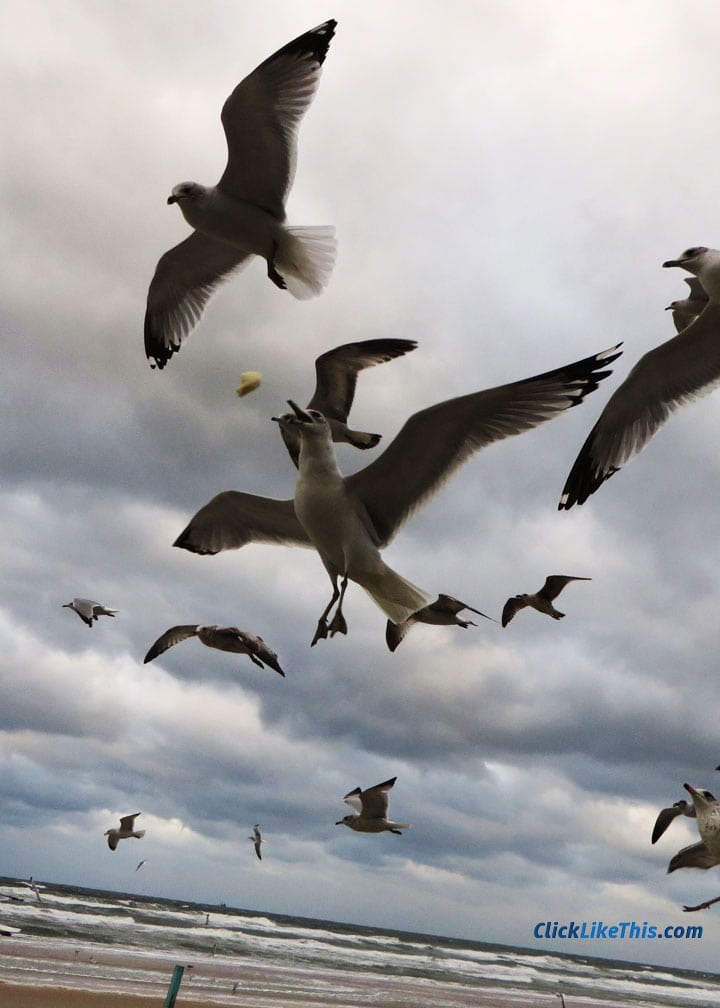
Before heading north, we spent a week in Daytona Beach together. On our last night in Florida, we took some bread to the birds on the beach. Now, we’ve fed lots of ducks and pigeons in the past, and we expected the same result. But this was completely different.
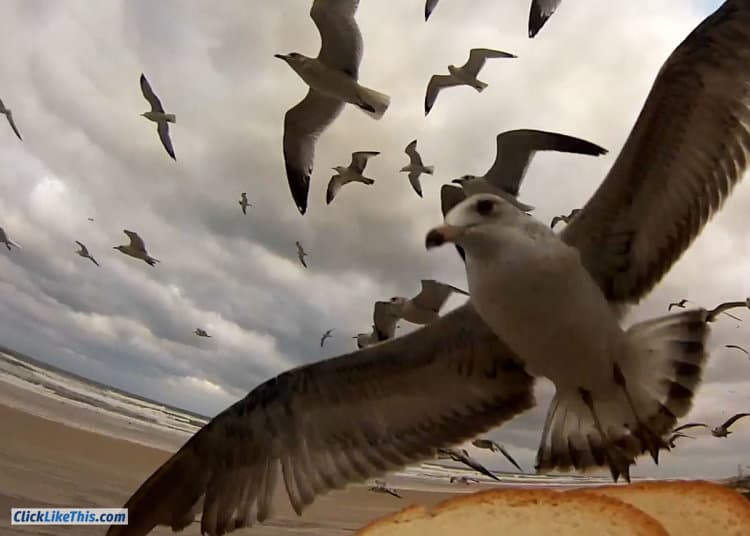
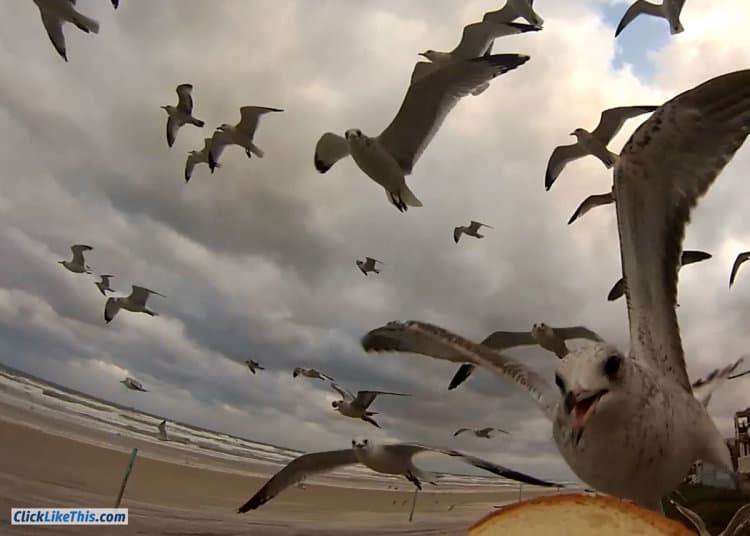
It was windy on the beach. With the wind at our backs, the seagulls took to the air and just hovered there. They took the bread out of our hands – sometimes without even flapping their wings.
And we talked more about that 20 minutes on the beach, than anything else we did that week. Those were a couple of well-spent loaves of bread.
Hand Feeding Seagulls in Flight
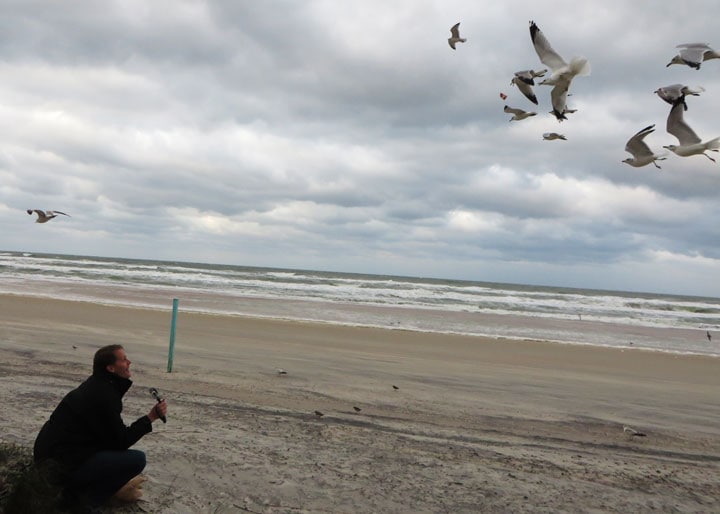
As you can see in the video, it was cold on the beach. That afternoon was around 8 degrees Celsius (46 degrees Fahrenheit).
We were wearing our winter parkas and still, the wind was cutting.
To shoot this video, I set the GoPro to video (1080 HD), mounted it on a selfie stick, and started filming (a solid 13 minutes).
At one point, you can see the camera on the beach – shooting up into the flock. We laid bread on top of the camera, and the birds snatched it in seconds.
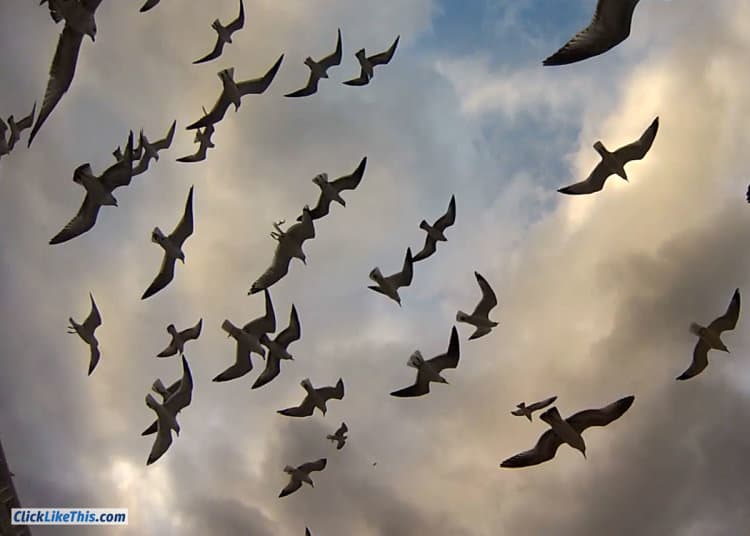
This video is an example of how average, non-extreme people can use the GoPro. Because it shoots super-crisp video and is waterproof and light, it’s a great family camera.

A couple of weeks ago, we visited Oaklawn Farm Zoo with friends.
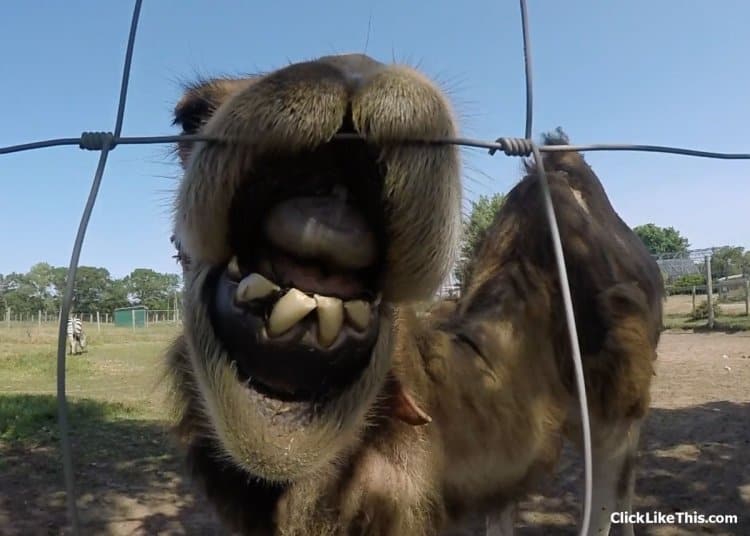
I’ve always loved that crazy camel’s mouth! During this visit, I was determined to catch it on video.
As you will see in the video, the camel was very curious. He followed me along the fence, eager to put his lips on the camera. My favorite is at 0:13 where he drags his face down the fence, causing his lips to bounce and flap.
A Flappy-Lipped Camel GoPro Taste Test
Here are some stills from the footage:

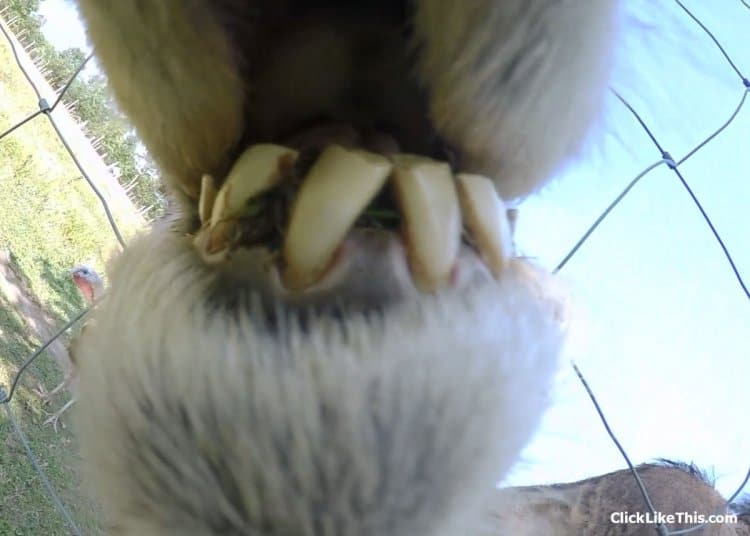
How Did I Get This Footage?
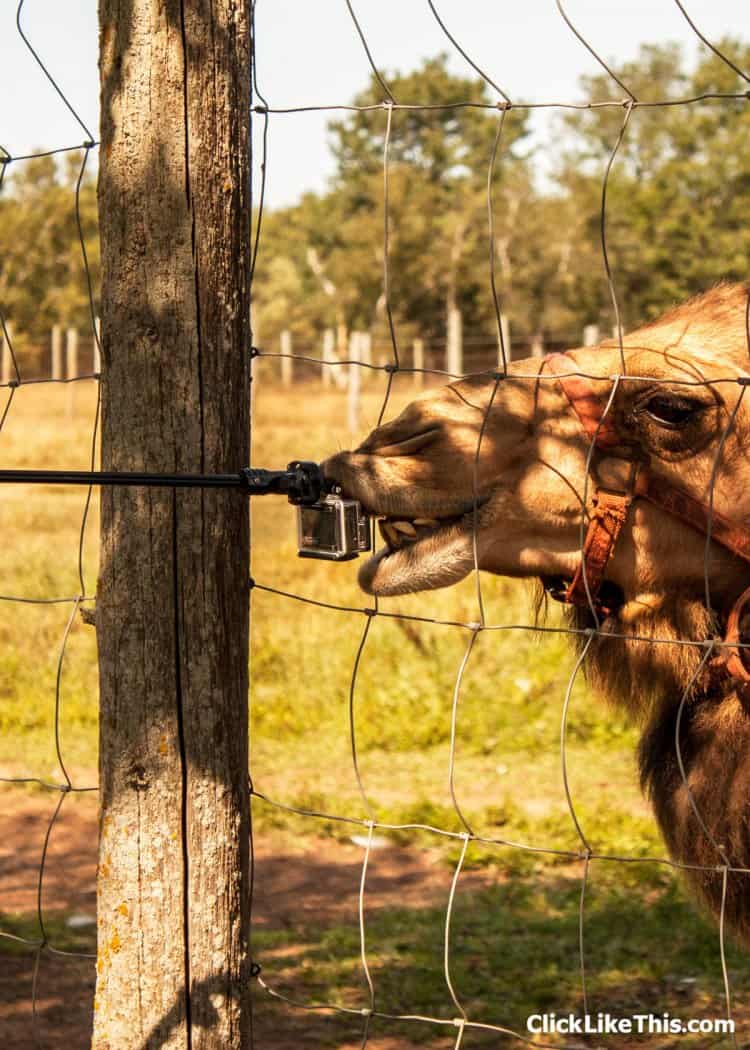
I love selfie sticks for animal shots.
My selfie stick (I prefer to call it an extender pole – seems a little less vain) is 48″ in length. Add a couple more feet of arms length and this gives me 6+ feet (2 meters) of reach.
While most animals (even zoo animals) are nervous of people up close, the six-foot space gives them the confidence to approach. And the shiny little camera with the flashing red light is irresistible to most animals.
In addition to the camel, we’ve played with monkeys, sea lions, marine iguanas, sea turtles, schools of fish, Galapagos tortoises, and a pond full of koi.
Tip: If you want great footage of animals, always use a selfie stick.
Here is a shot that Dena took while the camel was taste-testing the GoPro:
Want more? Here are 6 rattlesnake videos shot with a GoPro. Would you try this?
Take better animal shots with your GoPro when you use a selfie stick.
Your Turn
Have you fed your GoPro to a curious animal? Please share your links and tips below! Do you use your GoPro for animal photography? Have any tips to share? Please let us in on your secrets by commenting on this post.
- About the Author
- Latest Posts
Hey, I’m Dena! I’m a content creator and co-founder of Storyteller Tech.
Experienced GoPro Videographer: I’ve been shooting with GoPro cameras since 2012. Our first GoPro was the Hero3 Silver, bought for a Galapagos press trip. And today, we own 20+ action cameras, including GoPro, DJI, and Insta360 cameras.
Professional Creator: Bryan and I have developed video and content marketing plans for numerous international travel brands. And we also run several content businesses.
Photography Writer: I’ve written photography tutorials for well-known sites, including Digital Photography School.
Dena also creates at Storyteller.Travel and is co-founder of Storyteller Media, a Canadian-based publishing company.
James Smoyer
Tuesday 25th of February 2020
Great help!