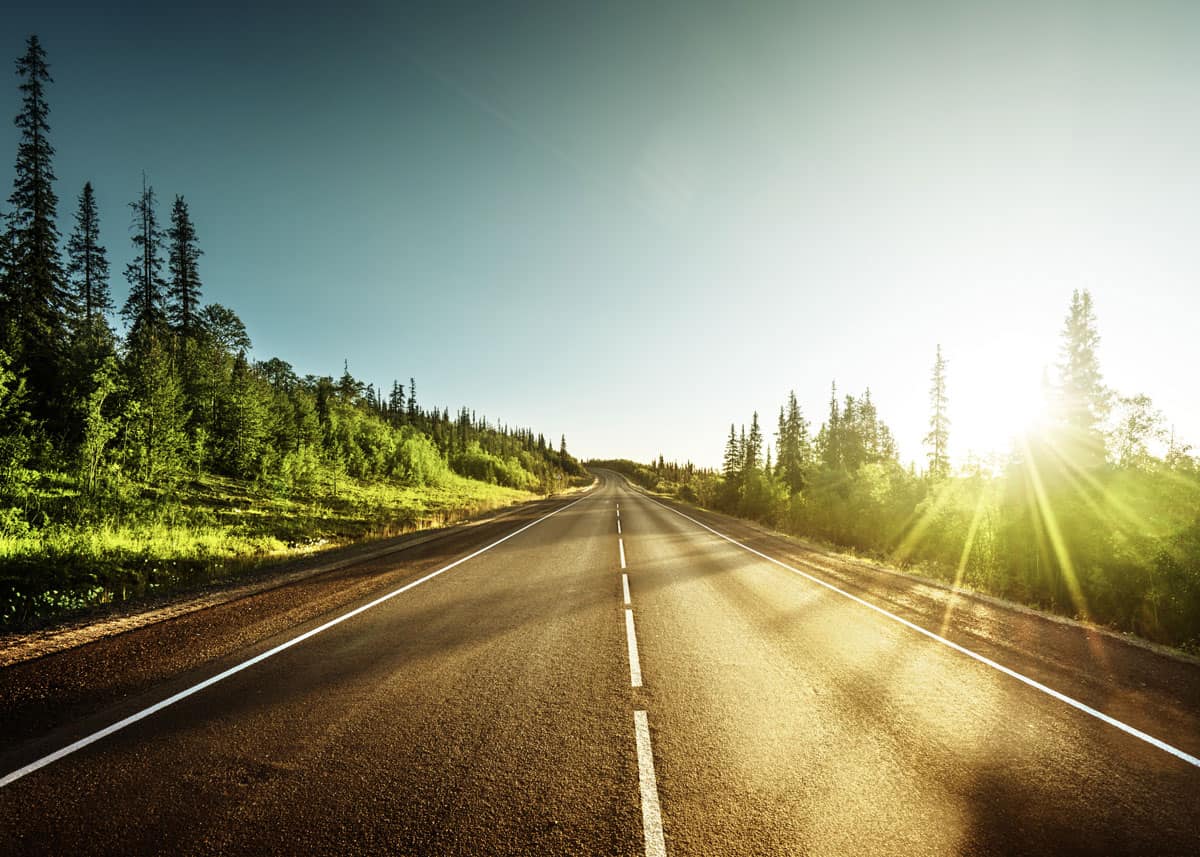
In this GoPro driving guide, you’ll learn how to create videos and drive lapses of your trips. We include settings, gear, and shooting tips to help you capture your road trip.
More of a motorcycle person? Here’s the guide for you: Guide to GoPro Motorcycle Filming
GoPro Driving Guide: 13 Tips and Settings
GoPros are the perfect camera for taking with you on your road trip. Thanks to their small size, you can mount them almost anywhere in or on your car, and you’ll also be able to capture top-quality driving footage.
So whether you’re looking for a camera to record your road trips or you’re thinking about setting up a dash cam, all you need is a GoPro camera and a mount or two, and you’ll be good to go.
Before you hit the road with your GoPro, here are 13 GoPro driving tips to help you capture the best possible driving footage.
Looking for a stable mount? Here are the best GoPro car mounts for rock-solid footage.
13 GoPro Driving Tips
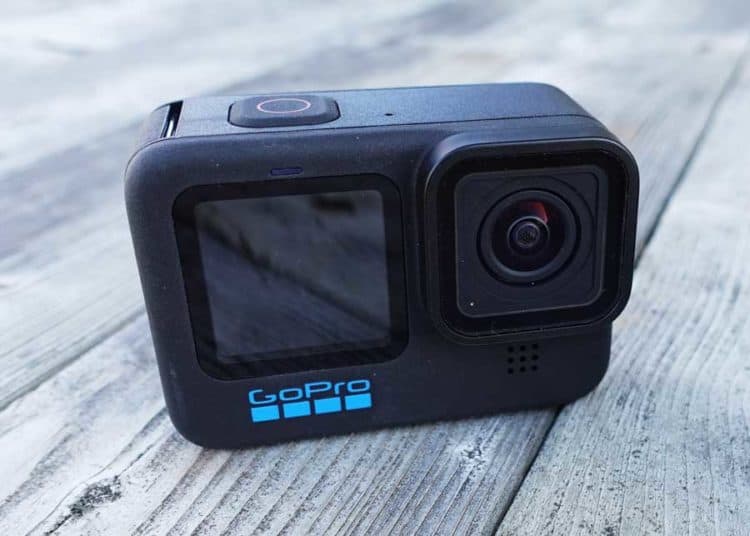
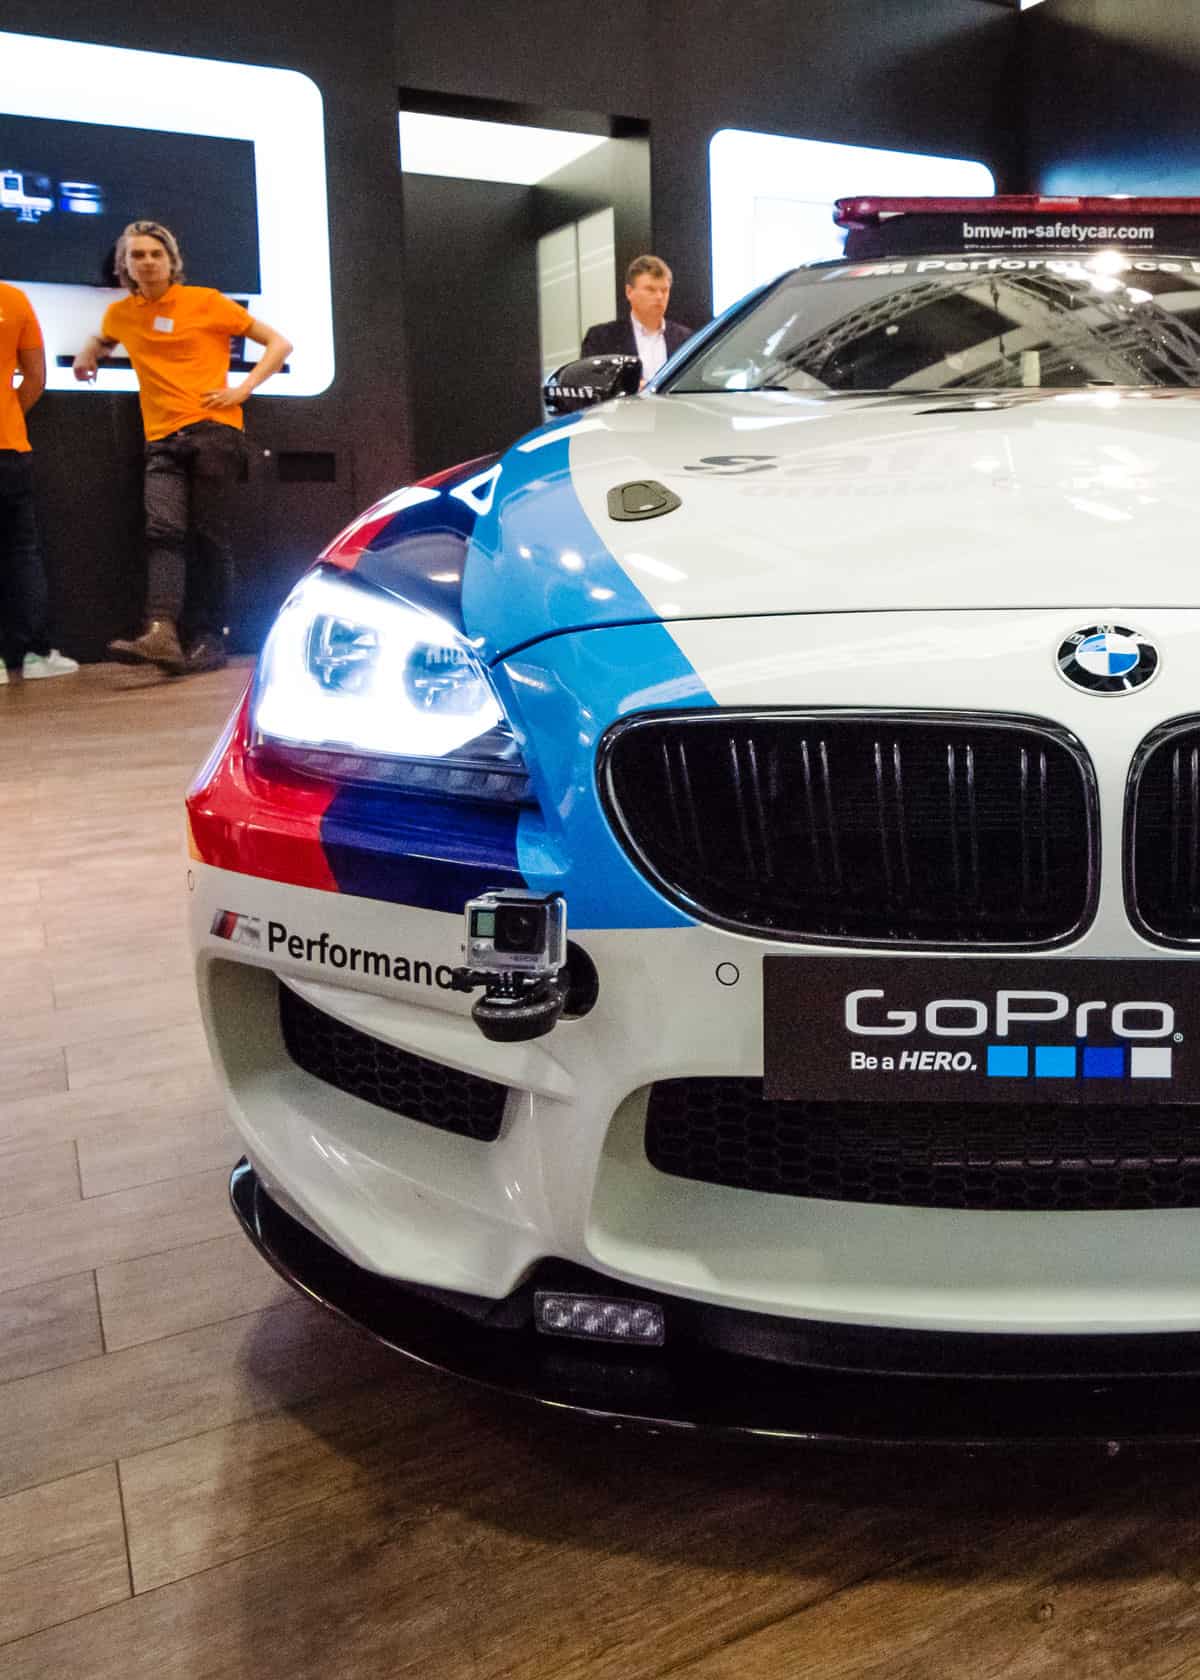
1. The Best GoPro for Driving: Hero11 Black
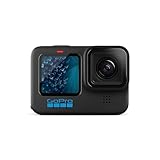
![]() If you’re serious about capturing quality driving footage for a road trip film, or just want to use one for dashcam footage, you’ll be wondering what GoPro will be best for the job.
If you’re serious about capturing quality driving footage for a road trip film, or just want to use one for dashcam footage, you’ll be wondering what GoPro will be best for the job.
Ideally, you’ll want a GoPro with stabilization. The last four GoPro cameras all ship with HyperSmooth – an in-camera stabilization feature that will level the horizon and remove the jitters that can happen on a drive.
- Hero11 Black (Premium) The new Hero11 Black comes with HyperSmooth 5.0 stabilization. And it shoots 5.3K video and can live stream 1080p.
Get your GoPro Hero11 Black on Amazon, B&H Photo, or Best Buy.
Really, any model from the Hero8 to the Hero11 will take superb video footage.
Is the latest model really necessary? No. We still have a Hero4 Black and Hero5 Black. Both of these make good driving videos. We also have Hero7, Hero8, Hero9, and Hero10. And while the older models will work, you will see a difference in the newer GoPro cameras.
In fact, I shot the following video with a Hero3 on a Pedco clamp mount while riding a bus in Cuenca, Ecuador. But as with most tech, it’s best to buy the latest model.
It doesn’t cost that much more – and it will be supported for longer – both firmware updates and accessories (batteries and replacement parts).
Last week, we picked up the latest GoPro. We plan to create and share some of our footage and what we learn along the way.
2. Capture some lifestyle shots
If you’re using your GoPro to record a road trip, don’t forget to include some lifestyle shots involving your road trip companions.
The scenery might be incredible, but after a while, it gets a little repetitive, so why not capture the essence of your trip by showing a little of your personality, and not just the route?
You could also use your GoPro to record the fun you had at your stops or the sights along the way. It’s about the destination as much as the journey, right?
In the following video, you’ll see how much more captivating a more personal road trip film can be:
3. Experiment with different angles
If you’re shooting to create a road trip film, you don’t want only to include one angle.
It might be tempting to mount your GoPro on the dashboard and leave it there for your entire trip, but why not seize the opportunity to get creative and put your GoPro’s versatility to the test?
You might need a few different mounts, but it will be worth it when your finished video is more varied and interesting.
By mounting your GoPro in different places in and around your car, you’ll be able to capture footage not just of the road and scenery but also of your road trip companions and your actual car.
Shots of your wheels spinning might not seem like much on their own, but when included as part of a road trip film, they can make your film look much more professional.
By experimenting with different angles, you’ll also give the illusion that you are working with not just one GoPro but several.
In the following video, you’ll see just how many different mounting options there are for GoPros on your car.
4. Shoot in loop mode when using your GoPro as a dashcam
There are plenty of purpose-built dash cams, but one of GoPro’s features makes it the ultimate multi-purpose dash cam on the market – Loop mode.
Loop mode can be used on most GoPro models and is a recording mode that allows your GoPro to film continuously without filling up your memory card.
You choose a recording interval, such as 5, 20, 60, or 120 minutes, and your GoPro will then divide your recorded footage into chapters.
For example, if you chose a 20-minute recording interval, your GoPro would split the footage into 5-minute chapters. Then, once you’ve recorded 25 minutes of your drive, your GoPro will automatically delete the first 5-minute chapter.
So if you set your recording interval to 20 minutes, you’ll always have at least 20 minutes of footage left on the memory card. If you set it to 5 minutes, you’ll always have at least 5 minutes of footage.
So when you use your GoPro as a dashcam, use loop mode, and if you happen to come across an incident, or worse, be involved in one, you won’t have to sort through hours of footage to find the moment you’re looking for.
Just stop your GoPro recording if something happens that you want to have a visual record of, and it will be saved as the most recent recording on your GoPro.
5. Use time-lapse to create a drive-lapse
A whole video of your drive can be quite a long and boring watch, even if you’re driving the most scenic of routes. It’s also going to use up a whole lot of space on your memory card, especially if you’re recording a particularly long drive.
So rather than filming an entire video, shoot a time-lapse of your journey instead, or a drive-lapse as frequent GoPro road trippers will call it.
You can mount your GoPro on the dashboard or somewhere a little more creative if you’ve got a few different mounts, and choose an interval setting. Whatever interval setting you choose, a time-lapse of your drive will be a much quicker and more interesting way to relive your journey.
Rather than recording hours of footage in real-time, you’ll have a quick video showing the progression of your drive. You’ll get the best of your journey in one quick clip.
Here’s an artistic drive lapse clip of New York City at night:
6. The best interval settings for driving time lapses
The interval settings you choose will largely depend on the length of your journey and how long you want your time-lapse footage to be.
If you’re driving for a fair few hours, you’ll probably want to choose a slower interval. Otherwise, you’ll end up with an incredibly long time-lapse video, which could be a little boring.
Longer intervals might take away the smoothness from your videos, but if you’re traveling on long roads, this shouldn’t be too much of an issue.
So for long car trips, try 10, 15, or 30-second intervals. 30-second intervals are your best bet if you’re traveling for many hours on long roads.
For shorter journeys of an hour or less, 0.5-second intervals will allow you to create smooth drive lapses that aren’t too long.
In the following video, you can see the difference between a few of the shorter time-lapse intervals:
7. The best frame rate and resolution settings
When using your GoPro to shoot driving footage, you want to shoot in a fairly high resolution at a fairly high frame rate.
Cars and the surroundings you drive by will move fairly quickly on camera, so if you want your footage to be crystal clear and free from any blurriness, you’ll need to capture more frames per second.
We’d suggest 60fps for most driving footage, as at this frame rate, you’ll also be able to find a good balance between frame and resolution.
Most GoPro models will be able to shoot in 1440p at 60fps, which will still give you HD footage. And if you have the newer GoPro Hero7 or Hero8, you’ll be able to make the most of your GoPro’s 4K abilities at this frame rate.
If you’re using your GoPro as a dash cam, you definitely won’t want to sacrifice too much when it comes to resolution. If you record an incident, you may need to zoom in to your footage, and the higher the resolution, the closer you can zoom in to capture more information.
8. Pack extra batteries or a car charger
If you’re planning on driving for more than a few hours, you’re going to need to take extra batteries or a car charger with you. Most GoPro batteries only last up to 4 hours, so if you want to capture more than the first leg of your journey, you’ll need to keep your GoPro charged and ready.
You can easily buy spare batteries in-store or online, or even better, a car charger for your GoPro that plugs into your car’s cigarette lighter.
Here’s how to make your GoPro battery last longer.
9. Adjusting the shutter speed
A longer shutter speed will blur moving objects in your time-lapses, giving them an artistic feel, especially when shooting a timelapse at night.
A longer shutter speed, and the slight blur that comes with it, will often give a better sense of motion and help make your time lapses a bit smoother.
10. Bring extra memory cards
If you’re not using your GoPro in loop mode, filming your car journeys or road trip will take up a lot of space. And you don’t want to run out of space before you’ve documented your whole journey.
So to avoid running out of space and having to sacrifice some great footage, make sure you pack extra memory cards. You can pick up memory cards fairly cheaply, so stock up on a few and you’ll have storage for all the driving footage you could possibly want to film.
11. Use auto white balance
So long as you’re not stuck in traffic, you’re going to be zipping down roads at a fair speed, which means your surroundings will be constantly changing. If you’re going to be on the road for a while, you’ll also experience changing light throughout the day.
So rather than constantly fiddling with your GoPro’s white balance settings, use the default auto white balance setting and your GoPro will continue to adjust the white balance throughout your journey.
12. Use a skeleton housing
![]() The GoPro skeleton housing is the best housing to use while driving.
The GoPro skeleton housing is the best housing to use while driving.
With this, you’ll still be able to plug your GoPro into a power source while recording.
And thanks to the open sides, your GoPro won’t get too warm when you record for long periods of time. This housing is also great if you’re hoping to capture some original road trip audio.
13. Get creative during the editing process
If you don’t edit your GoPro driving footage, you’re going to end up with so much footage that you’ll struggle to convince anyone to sit through it. Even if your footage is of the most interesting road trip, any driving film above a few minutes is going to get a bit repetitive.
So once your GoPro car journey is over, go over your footage, and edit it a little. You don’t need to be an editing pro, and you don’t even need to add in any special effects if you don’t want to. You just need to cut down your footage and decide what you want to include in your final driving film.
That being said, getting creative during the editing process can be a lot of fun, and can make a really effective driving film.
Road trip footage is often more interesting when different parts of the journey are sped up or slowed down. It adds variation and shows the passing of time a little better.
If you managed to shoot photos, videos, and drive lapses you can create a film that includes all of your material.
Learn more about how to zoom with GoPro.
6 Best GoPro Accessories for Driving
Delkin Fat Gecko Single
![]() This is the standard GoPro driving mount because it’s perfect for mounting on your dashboard. Just stick it to your dashboard, and you’re good to go. Your GoPro is going to be secure and steady.
This is the standard GoPro driving mount because it’s perfect for mounting on your dashboard. Just stick it to your dashboard, and you’re good to go. Your GoPro is going to be secure and steady.
Check current price on Amazon and B&H
The best thing about this mount is that it’s so easy to place or move around.
If you decide you want a change of angle you can move the mount in a couple of seconds, so you’re not going to be limited in the slightest.
Delkin Fat Gecko Dual

![]() This is a great mount choice for those who are hoping to get creative with their angles. This mount features two suction cups, making it extra strong and stable.
This is a great mount choice for those who are hoping to get creative with their angles. This mount features two suction cups, making it extra strong and stable.
So whether you were hoping to mount your GoPro in the car, or perhaps on the outside of the car, you’ll be able to do so.
Check current price on Amazon and B&H
This Delkin Fat Gecko mount is designed to hold cameras weighing up to eight pounds, so your tiny GoPro is going to be safer than ever on this mount.
It also has 360-degree tilt, turn, and rotation, so you can experiment with various angles.
GoPro auto charger
![]() This is a necessity if you want your GoPro to last a long car journey. GoPros typically only have up to four hours of battery life, so any long road trips will require a little more juice.
This is a necessity if you want your GoPro to last a long car journey. GoPros typically only have up to four hours of battery life, so any long road trips will require a little more juice.
You’ll also want to ensure your GoPro is full of life if you’re using it as a dash cam.
The auto charger can be plugged into your car’s cigarette lighter and used either to charge up your GoPro once it gets low on battery or to charge it constantly throughout your journey.
GoPro extendable pole mount
![]() If you’re traveling with others, you may want to get some ‘from the back’ footage and give your passengers a chance to record with the GoPro.
If you’re traveling with others, you may want to get some ‘from the back’ footage and give your passengers a chance to record with the GoPro.
A handheld mount means your GoPro can easily be passed from passenger to passenger without difficulty, so you can capture some great handheld footage.
The extendable pole mount can also be used to capture different angles, such as selfie shots, or through the sunroof shots.
Skeleton housing
![]() The Skeleton housing is the best housing to use for your GoPro whilst driving. You’ll still be able to control the GoPro using the screen, and plug it in to charge. Having an external power source is important for any driving videos lasting longer than one hour.
The Skeleton housing is the best housing to use for your GoPro whilst driving. You’ll still be able to control the GoPro using the screen, and plug it in to charge. Having an external power source is important for any driving videos lasting longer than one hour.
You’ll also be able to record audio and keep your GoPro cool.
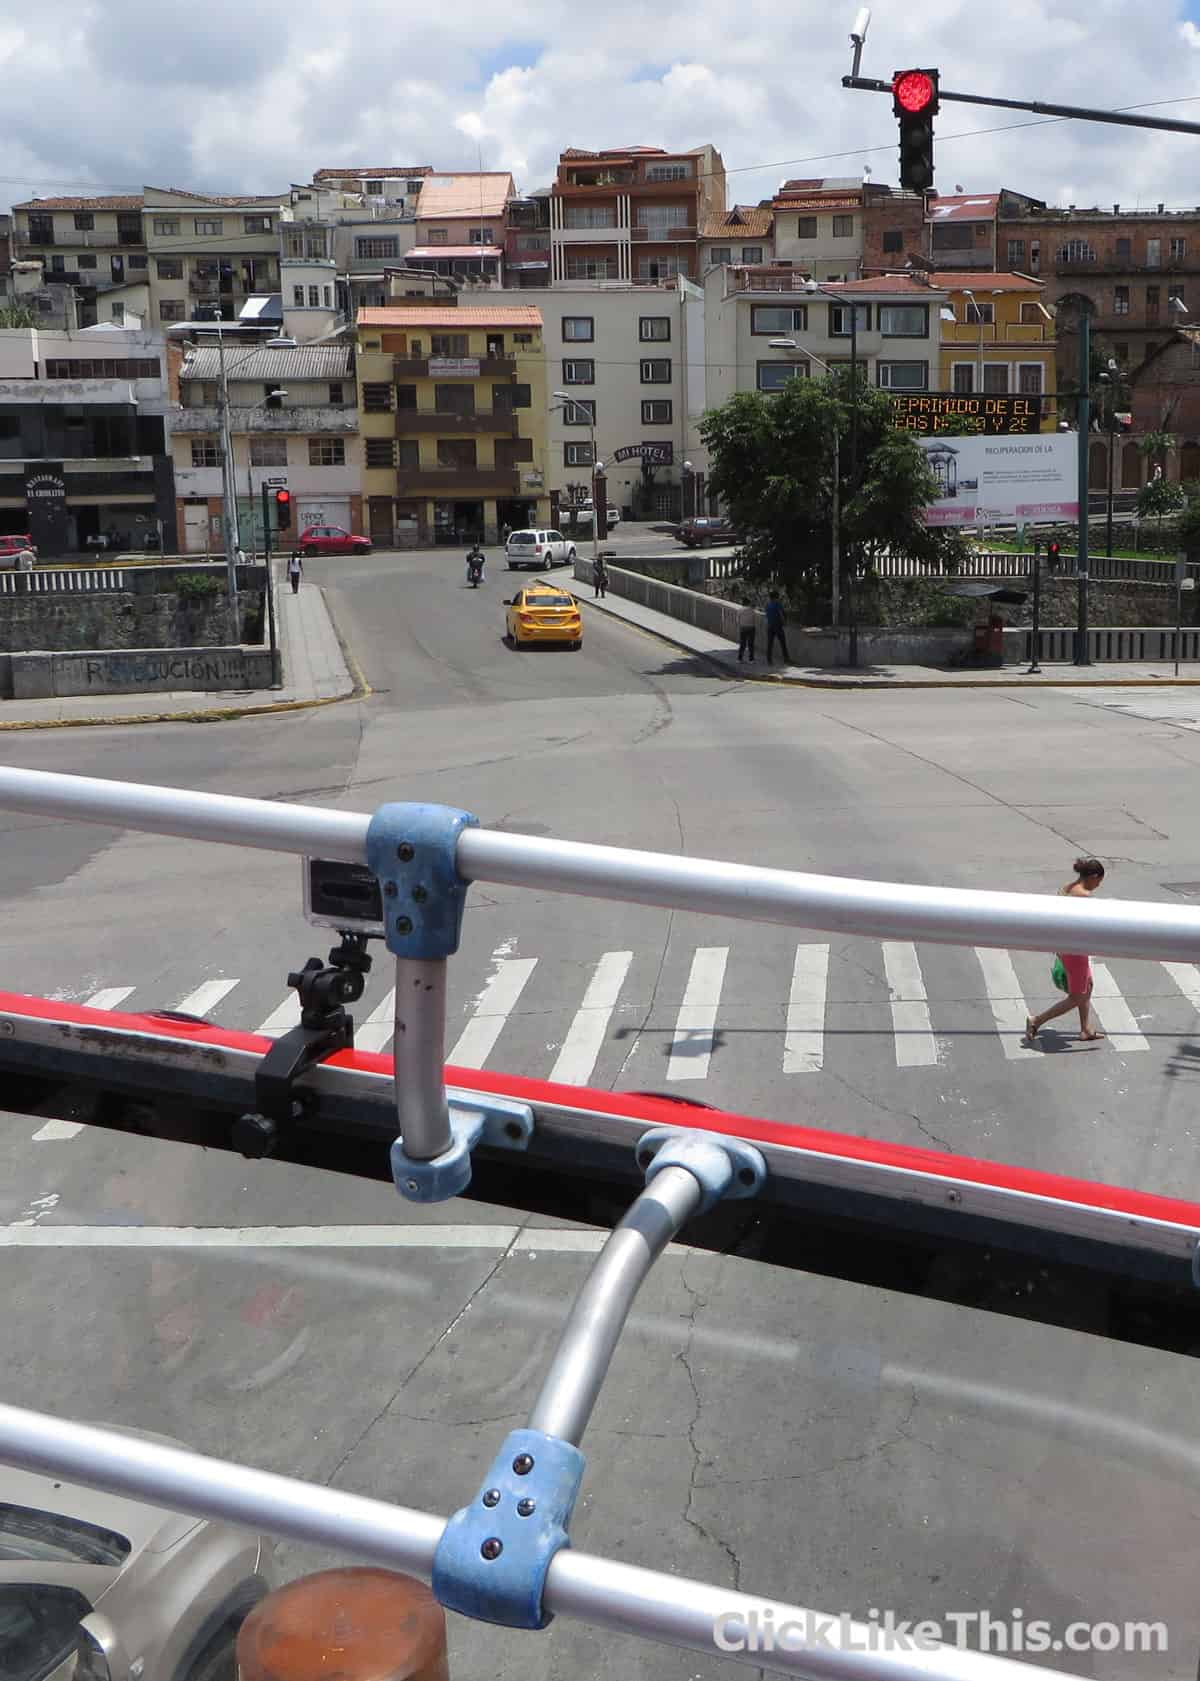
My GoPro is mounted on the front of this double-decker bus with a Pedco Ultra Clamp – absolutely the most stable GoPro mount available.
Pedco Ultra Clamp
![]() Without a doubt, this is my favorite mount for driving videos. Of course, this won’t work on every vehicle. But if you have a rigid flat surface you can clamp to, then this is the most stable mount you can use.
Without a doubt, this is my favorite mount for driving videos. Of course, this won’t work on every vehicle. But if you have a rigid flat surface you can clamp to, then this is the most stable mount you can use.
Consider this mount if you are shooting from a tour bus, jeep, truck with metal bumper or roll bar, or another non-traditional vehicle. Most cars won’t have anywhere to clamp this on.
Your Turn
What type of driving videos do you plan on creating? What setup are you using? Already created one? Share a link in the comments and show it off!
- About the Author
- Latest Posts
Hey, I’m Bryan! I’m a content creator and co-founder of Storyteller Tech.
Experienced GoPro Videographer: I’ve been shooting with GoPro cameras for over 11 years. My first GoPro was the Hero3 Silver, bought for a Galapagos work trip in 2012. Today I own 20+ action cameras, including GoPro, DJI, and Insta360 cameras.
Professional Creator: Dena and I have developed video and content marketing plans for numerous international travel brands. And we also run several content businesses.
Bryan also creates at Storyteller.Travel and is co-founder of Storyteller Media, a Canadian-based publishing company.
John
Monday 2nd of May 2022
Your guide is excellent and so informative!!
Can you please recommend any video editing software for a PC and Mac and even any good apps, so can edit during a long tour?
Terry Lessmann
Monday 23rd of September 2019
Hello, Just bought a Hero 7 black for in-car video at the track. Have the camera mounted behind the front seats. Lots of darkness in the car makes the outside wash out on sunny days. Do I set the EV to -1.0? Or something else to make the outside visible on bright sunny days. Thanks. Terry