It’s pretty gratifying to review footage from the adventure at the end of the day. Here’s how to connect your Sony camera to a TV. Follow these easy methods to quickly display your footage and photos on your television.
There are four ways to connect your Sony camera to a TV. These methods include connecting with an HDMI cable, USB cable, wirelessly, and a direct connection. These simple methods don’t require any special skills and limited gear. You’ll require a TV with USB or HDMI inputs.
4 Ways to Connect Sony Camera to a TV
Here is the breakdown for each of these connection methods. For more details on any of these methods, check out our full guide: How to Connect Camera to a TV, which covers details for all camera brands.
Okay, now on to the specifics.
1. Connect Sony Camera via HDMI Cable (4 Steps)
This is the most versatile method of connection. You can connect without downloads or plugins.
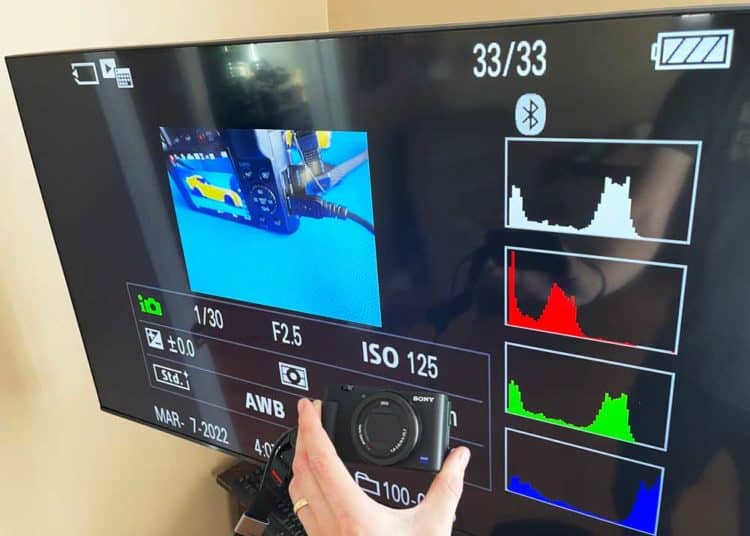
And the HDMI connection allows you to view all the metadata, including shutter speed, f-stop, histogram, and time/date details.
What HDMI connector will you need? Most Sony cameras have a Micro HDMI port. Sony cameras don’t ship with HDMI adapters, you’ll have to pick one up. I like this HDMI adapter. Once you have the adapter, you can use any HDMI extension cable.
Here’s how to connect your Sony camera to your TV via HDMI:
- Connect your Camera. Insert the micro HDMI cable end into your Sony camera. Connect the other end of the adapter to your full-length HDMI cable.
- Connect to your TV. Plug the other end of your HDMI cable into your TV.
- Turn on Your Camera and TV.
- Select the corresponding HDMI source input. This should enable a live menu or live preview from your camera.
You should now be able to view and playback your footage on your TV. You can use your TV remote to view and navigate the content.
For both of these methods, you’ll want to make sure that your battery is charged up. Here are 4 ways to charge your Sony camera battery.
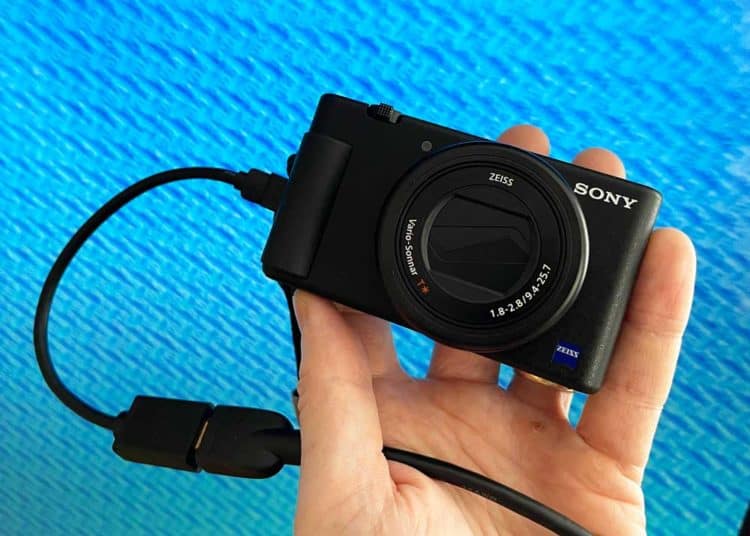
2. Connect Sony Camera via USB (4 Steps)
This is your second-best option if you don’t have access to a micro HDMI adapter. Or if your TV doesn’t have an HDMI port.
This is a great option because almost every TV, even old ones, has a USB port. And if you know where it is, you can also use the USB cable that came with your camera.
When you connect your Sony camera via USB, you’re turning your camera into an external storage device.
Here’s how to do it
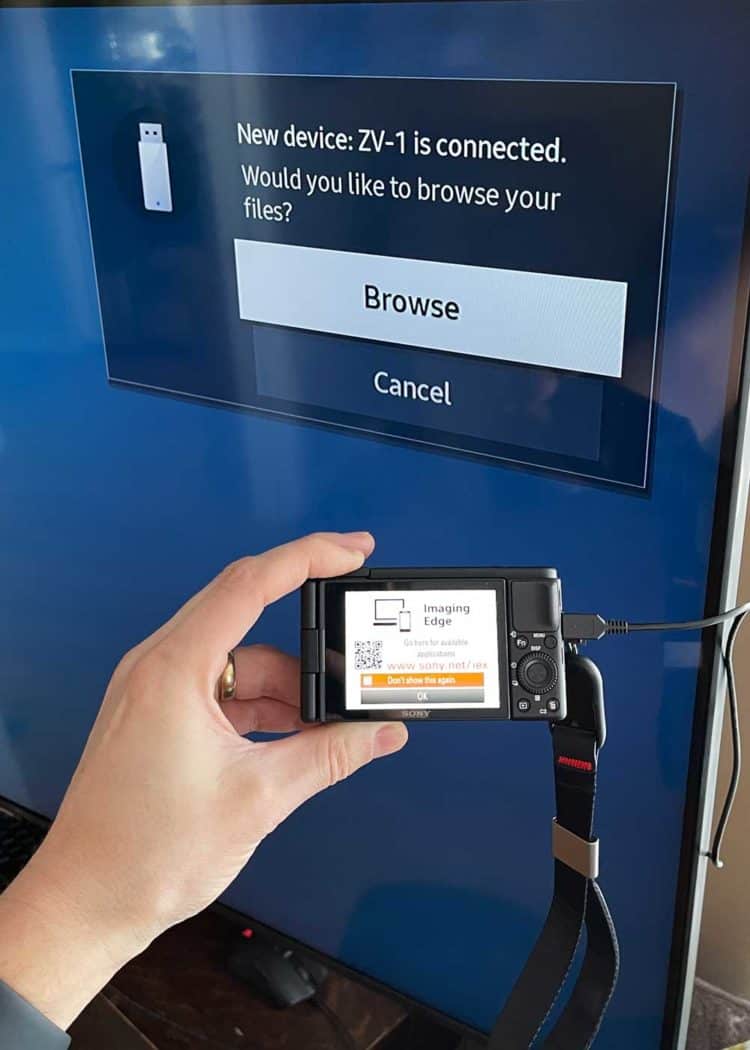
- Connect your camera to TV. Plug the micro USB end into your camera and the other cable end into your TV USB port. If your cable isn’t long enough, you can use a USB extension cable. While the supplied cable isn’t very long (24″ with the ZV-1), it was workable with my wall-mounted Samsung 50″ TV.
- Turn on both devices. Turn on your camera and TV if they aren’t on already.
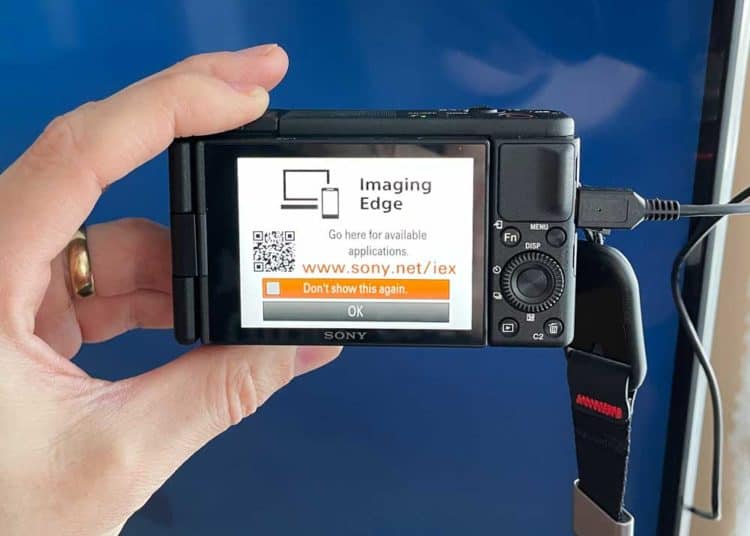
- Your camera should appear on screen as a data source. On my TV, I was given a choice to Browse the contents of the SD card.
- Navigate to DCIM Folder. Once connected, you’ll see a file structure, the same as if you were viewing your files on your computer. Navigate to the DCIM folder to view your photos and video clips.
Now you’ll be able to view your photos and video at full size on your television.
Which USB cable do I need? You will likely need a Micro-USB B. The required cable will be the same as the one that shipped with your camera.
3. Sony Camera Wireless Connection (View on TV)
WiFi-enabled Sony cameras can be connected wirelessly to your television.
To connect wirelessly, you’ll need to download the Image Edge Mobile app by Sony. Here is the info on Apple App Store and Google Play Store.
Here’s how to do it:
Here’s a brief tutorial by Sony to navigate the “View on TV” settings and menu.
So while some Sony cameras have this function, the actual execution of this might not be as smooth as you’re expecting. The reviews on the Sony app suggest that it can be glitchy.
If you try this feature and don’t love it – don’t worry. You can use one of the other three methods. And because the other connections are wired and direct, you can bypass many of the frustrations of wireless TV connections.
Learn more about the NP-FW50 battery in this Sony a6000 Battery Guide.
4. Direct Connect SD Card (4 Steps)
If you don’t have the correct USB or HDMI cable (and can’t be bothered to wirelessly pair your Sony camera to your phone, then to your TV), then this connection method is for you.
Here’s how to view your footage on your TV:
- Remove your SD card from your Sony camera.
- Insert your card directly into your TV. You can also use USB SD card reader if you don’t have an SD card slot on your TV.
- Once inserted, your memory card will appear as an external storage device, the same as if you connected your camera via USB. You’ll see the familiar folder structure as when using your computer to view files.
- Navigate to the DCIM folder to view your images and footage.
Want to use your computer instead? Here’s how to connect your Sony camera to a computer.
Your Turn
How did this work for you? Have a tip to share that might help other readers? Please share it below!
- About the Author
- Latest Posts
Hey, I’m Bryan! I’m a content creator and co-founder of Storyteller Tech.
Experienced GoPro Videographer: I’ve been shooting with GoPro cameras for over 11 years. My first GoPro was the Hero3 Silver, bought for a Galapagos work trip in 2012. Today I own 20+ action cameras, including GoPro, DJI, and Insta360 cameras.
Professional Creator: Dena and I have developed video and content marketing plans for numerous international travel brands. And we also run several content businesses.
Bryan also creates at Storyteller.Travel and is co-founder of Storyteller Media, a Canadian-based publishing company.