Ready to start shooting GoPro time-lapse videos? In this guide, you’ll learn the settings and gear you need to create your own. This guide includes a set of 5 detailed GoPro time-lapse tutorials.
GoPro Time Lapse Guide
Sure, GoPro cameras are great for action sports. But they also make some incredible time-lapse videos.
In this guide, you’ll learn about the settings and gear to consider when shooting your own GoPro time-lapse. And we end off the guide with 5 details tutorials.
What is a time-lapse video?
A time-lapse video is a series of photos shot over a period of time.
The images are then combined into a video and it gives the appearance of time being sped up. It is great for showing a busy market, sunrises, sunsets, blooming flowers, etc.
1. GoPro Time Lapse Settings
Here’s an overview of the settings and considerations for setting up your GoPro time lapse shoot. For a full breakdown of the settings, check out the set of time lapse tutorials below.
Before you can decide on your settings, you’ll need to decide on what your final product will be. How long do you want your video to be? How much action do you want to capture?
- 10 Seconds: To create a 10-second time-lapse video, you’ll have to shoot for 5 minutes (1 image per second) or 25 minutes (1 image every 5 seconds) if you play back the images at a standard 30 frames per second (fps).
- 30 Seconds: To create a 30-second time-lapse video, you’ll have to shoot for 15 minutes (1 image per second) or 75 minutes (1 image every 5 seconds) if you play back the images at a standard 30 frames per second (fps).
GoPro Time Lapse Settings
Here are the settings you should consider when shooting a GoPro time-lapse:
- Resolution: (7MP WIDE) For the Hero4 Black, I recommend shooting at 7MP W(ide). If you don’t require a wide-angle, the 5MP M setting will be perfect. What size video will you create with these still photos? While you can shoot your images at the highest resolution, there are limited benefits to this. What size photo do you need to shoot a 4K time-lapse? 4K resolution (3840 x 2160) is just an 8.3-megapixel image. Even if you shoot 5-megapixel still images, this will allow you to render a 2.7K time-lapse video (2.7K video resolution is 2704 x 1520 or 4.1-megapixel stills). Remember: higher resolution images mean larger files.
- Shooting intervals: (1 image every 2 seconds) Interval options range from one image every 0.5 seconds up to every 60 seconds. For most situations, you’ll find that an interval of 2 seconds will work well. Reduce the interval (0.5 or 1 second) and your video will slow down. Increase the interval (5 to 60 seconds) and your time will pass faster (if you render at the same rate).
- Shooting length: (From 10 to 20 minutes) This depends on your shooting interval and what you’re shooting. You’ll want enough time to pass to ensure that you capture some action. A busy street will require less time than slow-moving clouds. You should place the camera for at least 10 minutes if you’re using an interval of 2-seconds. This will create a 10-second video clip – perfect for scenes with lots of action (traffic, people). I usually shoot sunsets for 1-hour or more. The sun moves slowly and you need a longer shooting length to show the movement.
- Protune: Protune is a set of features that enhance your footage. Shooting in Protune is an advanced setting and isn’t required.
There are lots of things that can be shot as a time-lapse video. The settings you should use will depend on the specific situation.
Common Time-lapse Intervals
Here are some common time-lapse ideas and some suggested shooting intervals for each one.
1 Second Intervals
- moving traffic
- drive-lapses (like this one I shot in Cuenca on a double-decker bus)
- fast-moving clouds (like the one I shot in Yunguilla Valley, Ecuador)
2-5 Second Intervals
- sunsets/sunrises
- slow-moving clouds
- crowds of people
10-30 Second Intervals
- moving shadows
- sun moving across the sky
- night lapse/stars (maybe 10-60 second intervals)
30-60 Second Intervals
- fast-growing plants
- construction (if there’s a lot of action – like walls going up or trusses being put in place)
- snow falling
Creating a video from your photos isn’t hard. With GoPro Studio – it will take only a few minutes.
Here are a few things to watch for when editing:
- Playback Rate: Standard video frame rate ranges from 24 to 30 frames per second (fps). The frame rate you choose will depend on the feel you want for your video. It is also affected by your original shooting interval.
- Filters: Called “Presets” in GoPro studio, these can significantly improve and change your footage. They can change aspect ratio, change day for night, and brighten your footage.
- Resolution: Most videos will be great at 1080P for YouTube. Unless you’re rendering for a professional format, this is probably all you’ll need.
Tip: If your time-lapse seems a little long (boring) just speed up the frame rate. It’s better to have a compelling 10-second clip – than a 40-second clip that seems like it’ll never end.
2. Gear for GoPro Time Lapse
Aside from the camera and the correct settings (see above) you don’t need much gear to shoot a great time-lapse video with your GoPro.
But there are some things that will make it easier. Here’s what you should consider:
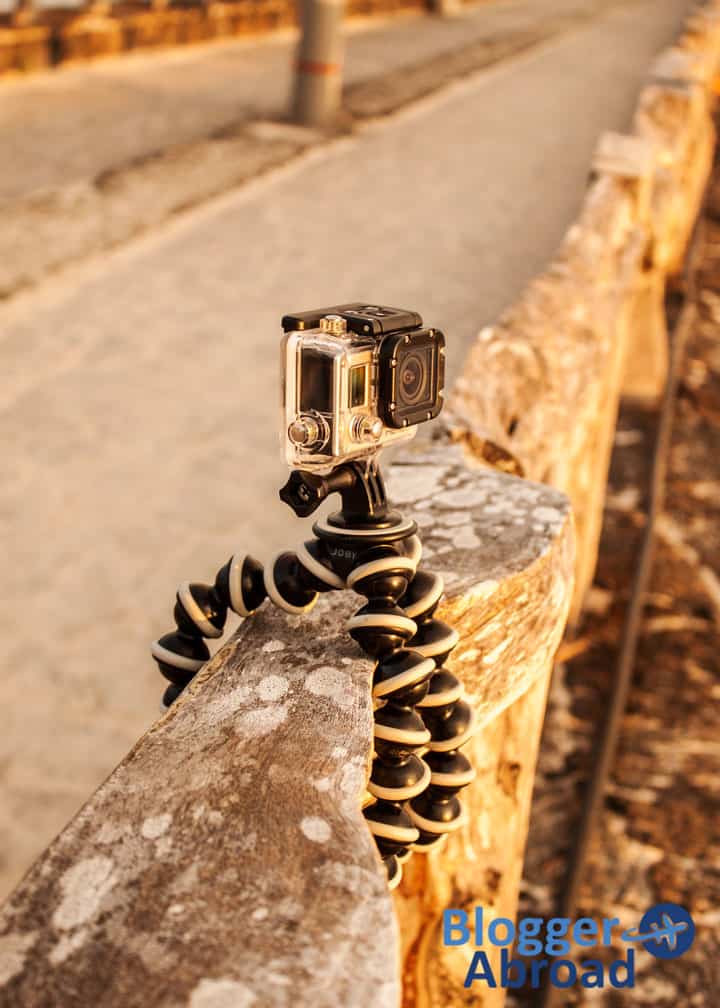
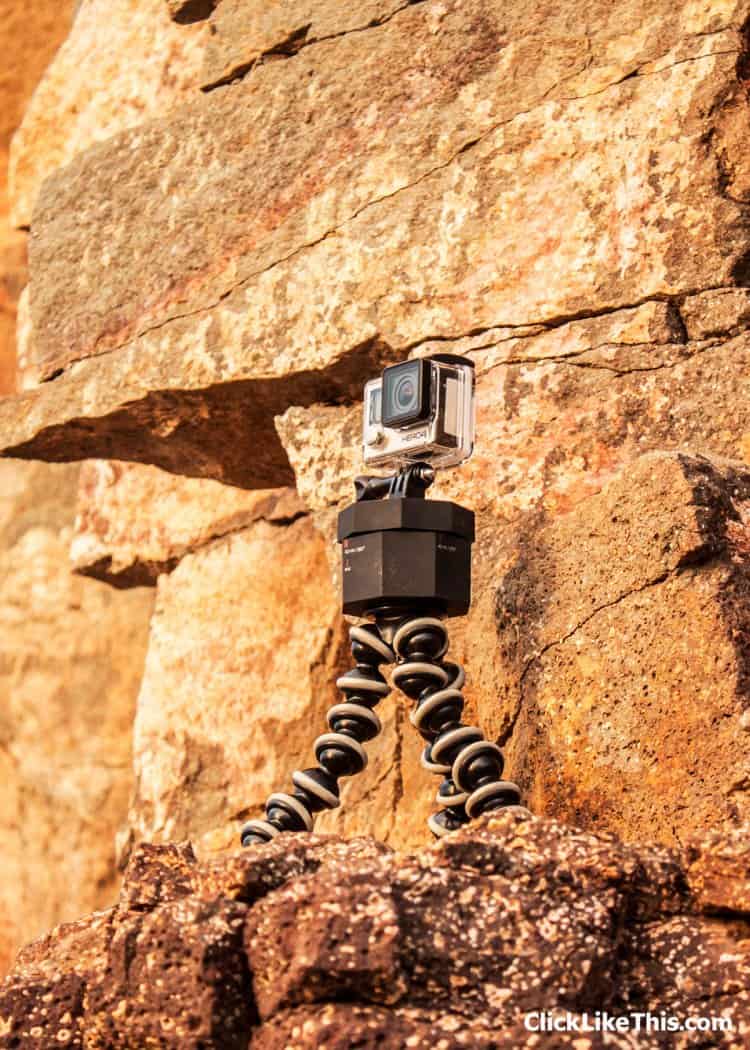
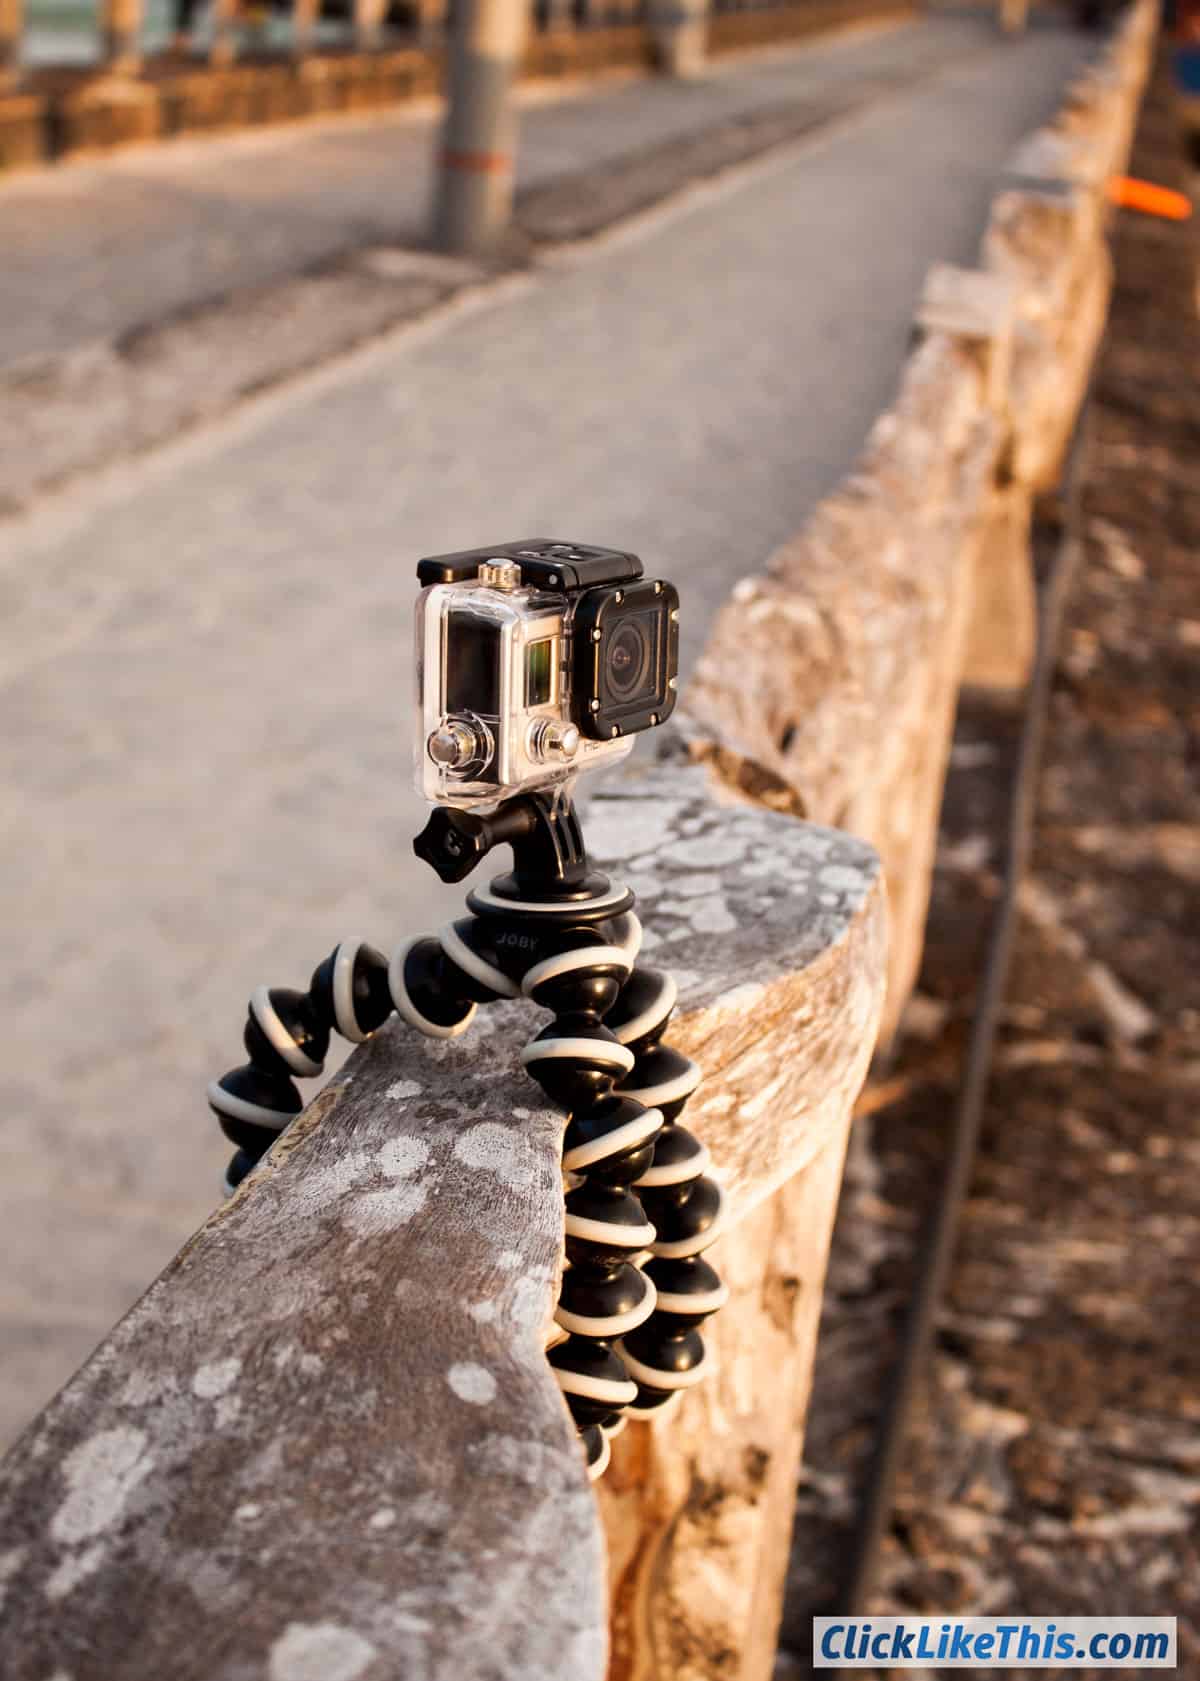
 Stable Mount: Without a tripod, your images will not blend properly into a watchable video.
- Large memory card: Even if you shoot at 5 or 7MP, the card can fill up quickly. Choose the largest card you can afford – and that your camera will accept.
- Batteries: If you want to shoot longer than one hour, you’ll want extra batteries.
- Rotating mount: This will give a sweeping motion to your time-lapse video.
Stable GoPro Mounts
There are a number of mounts that will do this. And the best mount for your shoot will depend on where you’re shooting.
- UltraClamp Mount: This is one of my favorite mounts. It attaches to benches, doors and signposts. Read my UltraClamp review.
- GorillaPod: I bought my first GorillaPod with my first dSLR about 10 years ago – and I’m still using it. They are expensive and they are worth it. I now own three different sizes – the newest one has a level and a ball head for fast leveling.
- Suction Cup Mount: This is best for driving time-lapse videos. I created a dozen videos of Cuenca, Ecuador while driving around the city in my truck.
Large (and fast) memory card
![]() Even if you shoot at 5 or 7MP, the card can fill up quickly. GoPro cameras all use microSD cards. Here’s what we use in all our cameras:
Even if you shoot at 5 or 7MP, the card can fill up quickly. GoPro cameras all use microSD cards. Here’s what we use in all our cameras:
- SanDisk Extreme (32, 64, 128GB): While you can access the photos via USB cable, I usually remove the microSD card and copy the footage via a card reader and the included SD card adapter.
Although you can get microSD cards up to 256GB, GoPro cameras will only accept up to 128GB.
GoPro Batteries
- GoPro Batteries: I like to travel with a handful of charged batteries. If you shoot a time lapse that lasts longer than an hour, you’ll need to change your batteries. Because Hero5 is still brand new, there aren’t many aftermarket options for batteries. This should change in the coming months.
- Powerbank: For extended time-lapse shoots, you might consider direct connecting a power bank directly to your camera. I’ve done this a few times and it is amazing.
- GoPro Session (Hero4 and Hero5) doesn’t have a removable battery pack.
Rotating mounts
There are two ways to do this: Camalapse or DIY.
- DIY Rotating Mount: With a kitchen timer and an adhesive mount you can make your own rotating time-lapse.
- Camalapse: If you’re like me, you like the sounds of DIY but it takes time. For a few bucks more, you can buy a mount that is made just for this purpose. This is the mount that we own. I’ll be publishing footage from it soon.
3. GoPro Time Lapse Tutorials
This set of tutorials shares everything I’ve learned so far about shooting GoPro time-lapse videos.
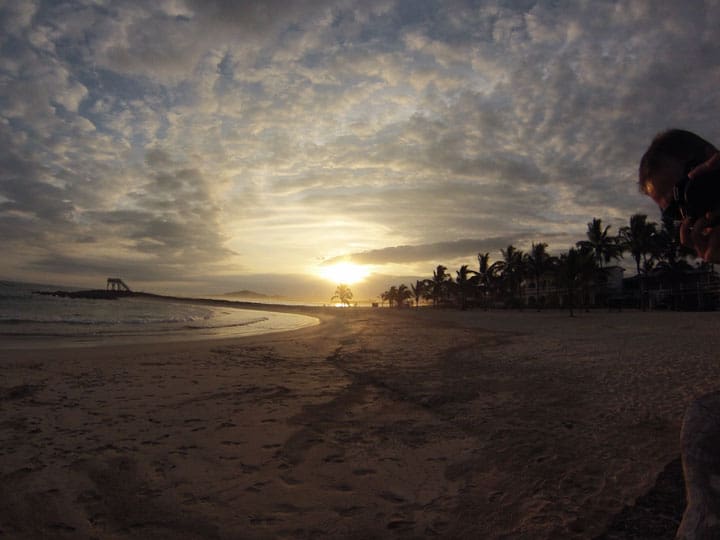
How to Create a GoPro Sunset Timelapse (Galapagos Clouds)
This was my very first time-lapse video – and it’s still my favorite. I first published this tutorial on October 1, 2014.
See all my settings below the video.
In this section, I’ll cover the specific settings needed to create a quality time-lapse video, including the shooting interval, image resolution, and playback rate.
Okay, now let’s get started:
GoPro Time Lapse Settings to Time-Lapse Video
- Decide on the shooting interval. This time-lapse was shot with one image every two seconds. Remember that it’s easy to remove extra images, but they cannot be added if they weren’t shot. This shoot produced almost 700 images (4.12GB) over 35 minutes.
- Decide on image resolution. This set of images was shot at 10MP (3840px X 2880px). This was overkill and is rated as ultra-high-definition (2160p). For a standard high-definition video, you should shoot at 1080p (1920px X 1080px). This is around a 2MP image. Because you will sometimes want to crop the video, it is a good idea to shoot a slightly higher resolution (like 5MP) which gives you some room to crop and still finish with a high-definition video.
- Decide on playback rate. I’ve found that 15 fps (frames per second) playback rate keeps things fluid without making them move too fast.
- Render and upload. Once you’ve organized your images and entered these settings, you are ready to render the video and then upload it on a video-sharing site.
What you’ll need to create a GoPro time-lapse video: a GoPro Hero3+, Gorillapod tripod, Wasabi battery, large capacity memory card (I prefer the 64GB), and some editing software.
5 Tips for GoPro Timelapse Video
- Use a solid (stable) tripod: There are lots of options (tripod, suction cup, etc.) but it is hard to beat the Joby Gorillapod. It is easy to set up and gives a death grip. If your camera moves, your time-lapse is ruined.
- Use long-life batteries: The last thing you will want to worry about is your battery dying halfway through the shot. I like the Wasabi brand. They last longer than the standard battery that comes with the GoPro. And they come with their own charger (both wall and car adapter).
- Use a huge memory card: Space is the other constraint. Shooting hundreds of images over a short period of time will quickly fill up your memory card. I like using a 32GB Class 10 microSD card – I haven’t been able to fill one in a day yet. Choosing the right image resolution will help ensure that it doesn’t fill up too quickly.
- Take time to frame it up: Even the most magnificent setting can look awful if you don’t take the time to frame it up. Follow the rule of thirds to shoot a pleasing video.
- Avoid distracting elements: One of the major problems with time-lapse videos is the close-up elements – because they are distracting. As you will see in the tutorial video below, they can ruin the whole video.
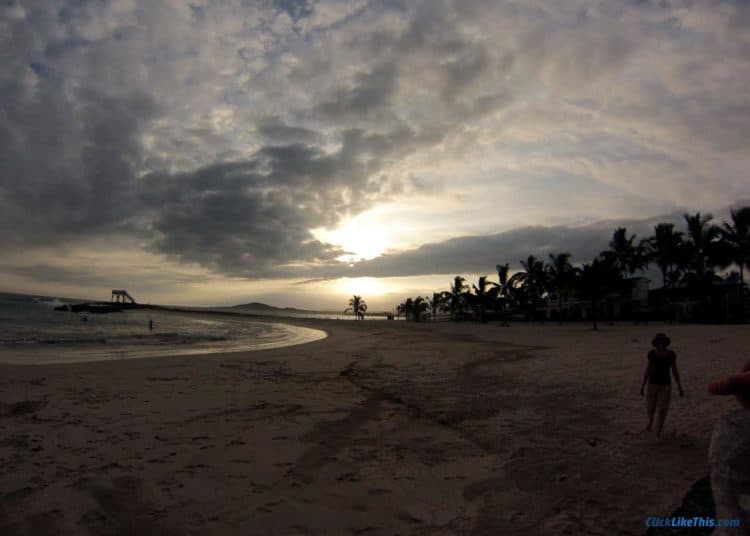
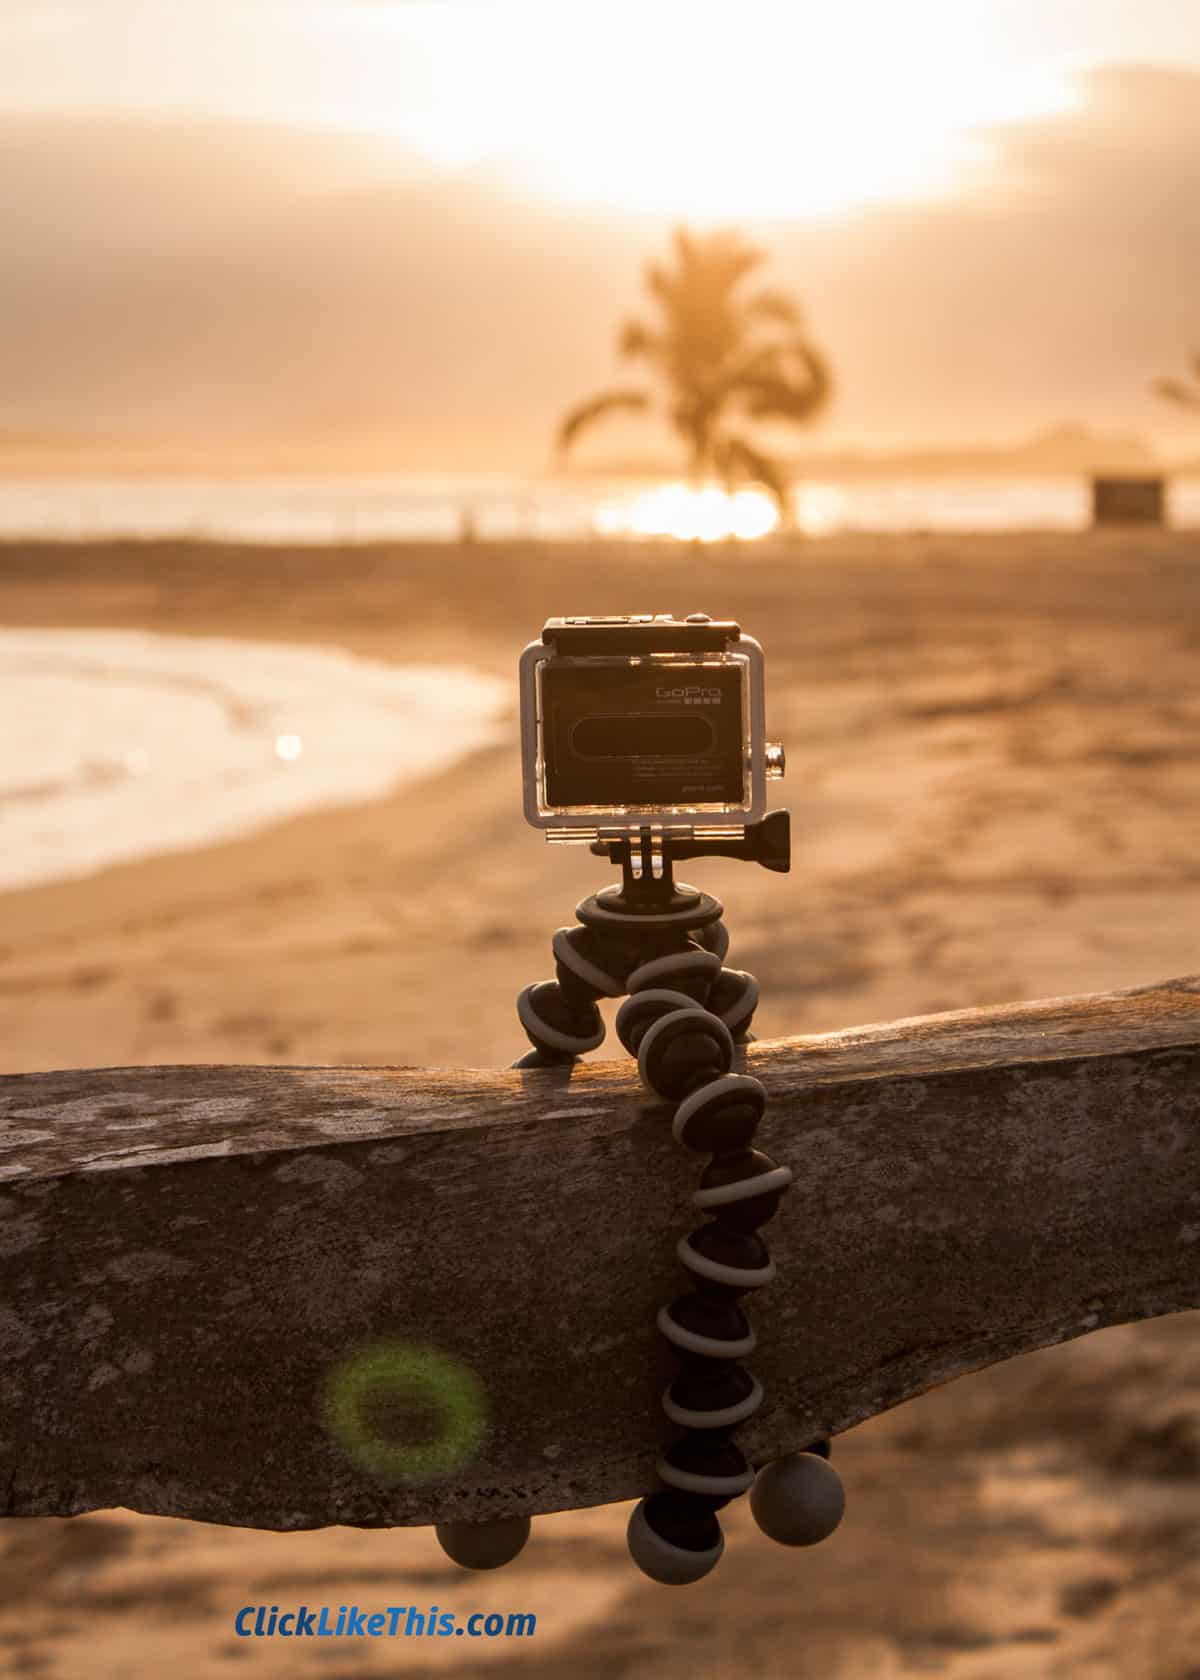
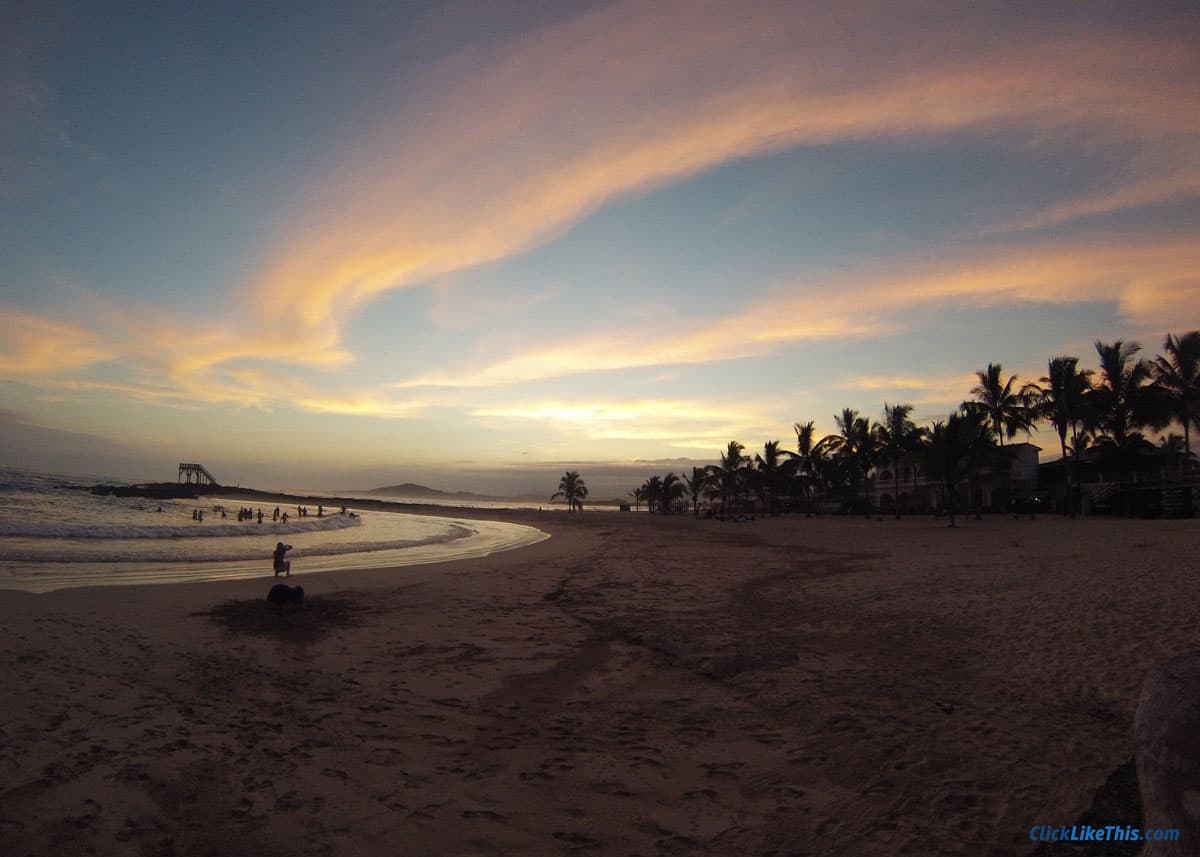
GoPro Sunset Timelapse Settings and Tips (Galapagos Beach)
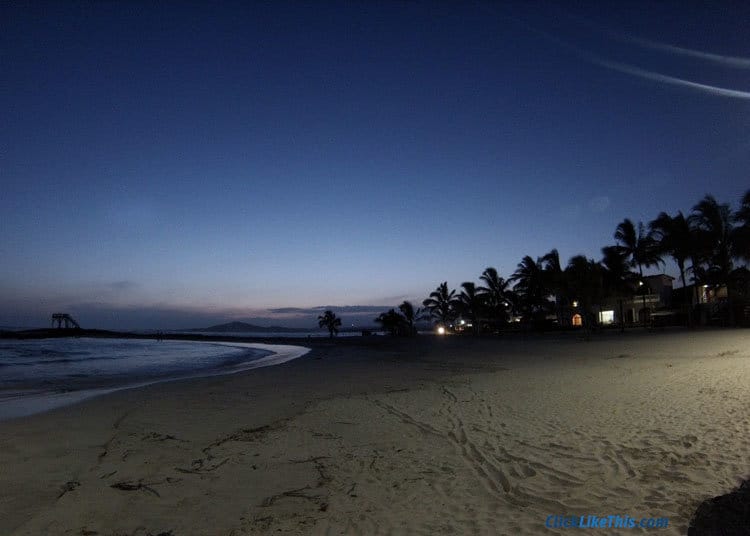
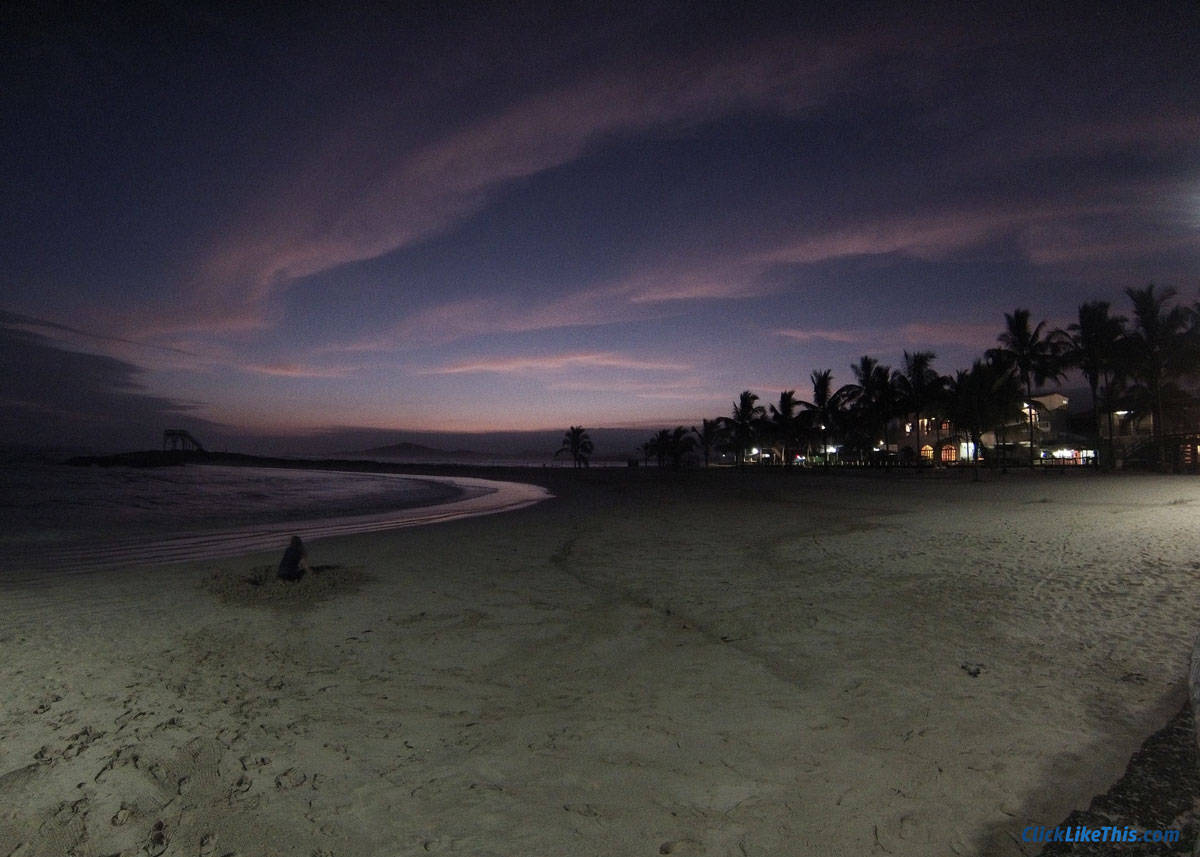
A few years ago, I created my first time-lapse video while visiting the Galapagos Islands. The images and video in this section were all shot on Isabela Island. This beach is directly in front of the lodge where we were staying. This section was first published on March 25, 2016.
In this section, I review what I’ve learned since publishing my first time-lapse tutorial (previous section). Some of the settings were good – but others could be improved. I also created a new video showing how frame rate affects the feel of the video.
5 GoPro Sunset Timelapse Settings
Here are the GoPro time-lapse settings I recommend for shooting a sunset.
- Shooting Interval: This time-lapse was shot at a rate of 1 image every 2 seconds. This shoot produced nearly 700 images (4.12GB) over a period of 35 minutes.
- Image Resolution: While this was shot at 10MP (on the Hero3 Silver) it was overkill. If you want an HD video (1080P), shooting at 5MP image resolution is plenty. Shooting higher-res images means that your card will fill up faster – and the image set will take up more space on your computer.
- Playback Rate: When I first rendered this time-lapse, I output it at 15 fps. In retrospect, this was too low and made for a fairly boring video. I recommend a minimum of 30fps. See more below.
- App Connection: I recommend that you don’t use the WiFi connection during a time-lapse. It drains the batteries faster – and if you have to change batteries during the shoot, it will change the composition. I used Wasabi batteries for this shoot.
- Card Size and Speed: You’re not going to want to skimp on your card size. High-resolution images (shot every second or two) will fill up a small card quickly. If you are planning on shooting a few time lapses in one outing, I recommend a 32GB card (at least). And speed matters. I recommend the SanDisk Ultra card – in either 32 or 64GB.
Bonus Tip: Choose an evening when there is some cloud movement. The video below was shot the day before – and is much more dramatic. While the clear sky has its own appeal, I definitely favor the painted, moving clouds.
Best GoPro Frame Rate Setting for Sunset Time Lapse
What’s the best frame rate setting? It depends. If the sunset time lapse is part of a longer video, you’ll want to have a higher frame rate – so it goes faster. If the sunset timelapse is the purpose of the video, a lower frame rate is fine – it will make a longer video.
My GoPro Setup: Sunset Timelapse
- Hero3 Silver: This was my first GoPro and still shoots a respectable quality video.
- Joby GorillaPod: You’re going to want a stable mount. If your camera moves at all during the shoot, it’s going to be ruined. I’ve had great success with the GorillaPod.
- Wasabi Batteries: You’re not going to be happy if your battery dies during your shoot. If you have to change your battery, your composition will change. In my tests, Wasabi batteries last longer than the GoPro ones – and they cost less.
- SanDisk Ultra Memory Card: You are going to be shooting hundreds of large images. You’re going to need a memory card that can keep up. Depending on your shooting rate and image resolution, your camera might reduce image quality so your card can keep up. For this shoot, I used a Class 10SDXC card, but have now upgraded to the Extreme PRO series.
5 Required GoPro Hero3 Timelapse Settings
With these GoPro Hero3 timelapse settings, you’ll be ready to create your own. Here are the settings, gear, and tips you need to create some great time-lapse clips.
In this section, I’ll share the time-lapse settings I use to create videos with my GoPro Hero3 camera.
In addition to the Hero3 time-lapse settings, you’ll also learn how to create your own time-lapse video. I also share a list of some great time-lapse subjects, complete with suggested intervals.
5 GoPro Hero3 Timelapse Settings
Here are the GoPro Hero3 timelapse settings I used for the above sunset timelapse.
- Shooting Interval. This time-lapse was shot at 1 image every 10 seconds. This rate generated 484 images over 90 minutes. This was an ideal interval because the shoot was so long. For a shorter time-lapse, you can also shorten the interval (to 1-2 seconds). See more on Shooting Intervals below.
- Shoot at 5MP Resolution. I shot the still photos at 11MP (on the Hero3 Silver) – and it was higher than necessary. For an HD video (1080P) 5MP image resolution is plenty. Higher-resolution images will unnecessarily fill up your card.
- Turn Off Your WiFi Connection. I recommend that you don’t use the WiFi connection during a time-lapse. It drains the batteries faster – and if you have to change batteries during the shoot, it will affect the composition. Not only does this affect the final product – it wastes time in post-production. Even without WiFi, 90 minutes is a long shoot and I had to change the battery after about an hour. (You’ll see the hiccup in the video at 0:19.)
- Choose a Large and Fast Card. You’re not going to want to skimp on your card size. High-resolution images (shot every second or two) will fill up a small card quickly. If you are planning on shooting a few time lapses in one outing, I recommend a 32GB card (at least).
- Use a Stable Mount. I can’t stress this enough. While this isn’t an on-camera setting, the success of your shoot depends on a stable camera mount. If it moves a little, it can be hard to watch. If it moves a lot – you’ll need to start over. You’ll need to think about people-bumping, wind-blowing, and battery-changing. For this shoot, I used the SLR GorillaPod (pictured below).
Tip: Since this shoot, I bought the Pedco UltraClamp. This thing is strong! (I even shot a driving time lapse and it stayed tight for two hours on top of a bus!)
How to Create a GoPro Time Lapse Video
Unlike the newer models, the Hero3 and Hero3+ cameras don’t automatically create a time-lapse video.
Don’t worry, it’s super easy to create your own time-lapse video with a GoPro Hero3 camera.
To create a time-lapse with your Hero3 camera, you’ll need to follow these two steps:
- Shoot the photographs. You’ll first shoot your set of time-lapse images. And you’ll need anywhere from a few hundred to a few thousand photos. See the above settings.
- Edit into a video. This is done on your computer. Using free editing software, it’s super easy. I’ve embedded a video tutorial at the end of the post.
These are the GoPro Hero 3 timelapse settings that I’ve used. What settings are you using to shoot a time-lapse video with your Hero3?
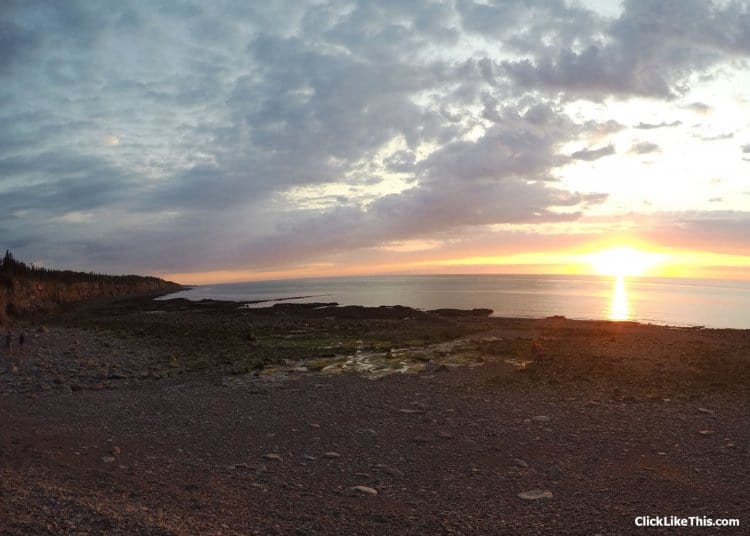
How to Create a GoPro Sunset Time Lapse (Morden, Bay of Fundy)
In this section, you’ll learn how to create a GoPro sunset time-lapse video. I first published this tutorial on September 5, 2015. The settings follow the video.
To create a sunset timelapse video, you’ll need four things:
- A steady tripod. I favor the Gorillapod SLR. It is stable enough for a heavy DSLR – so it doesn’t budge with a GoPro.
- GoPro camera Any version will work. This video was shot with the Hero4 Black.
- Charged batteries. You should bring an extra one or two. This was shot with Wasabi batteries.
- A great location. It’s hard to beat the Bay of Fundy (Nova Scotia) for a sunset. Morden is a family favorite. We shot this footage while having a fire on the beach. You can see the occasional puff of smoke drift across the video (from left to right).
GoPro Sunset Time Lapse Settings
I shot one 12MP image every 0.5 seconds. While this should have produced 120 images/minute, the camera produced 90 images/minute. I’m not sure why, but the result is still good.
This was shot from 7:50 PM to 9:07 PM – a total of 77 minutes. Here are all the settings I used:
- Time-lapse interval: 0.5 seconds
- Resolution: 12MP (4000 x 3000 pixels)
- Shooting time: 77 minutes
- Total image count: 6794 (14.6 GB)
- Location: Morden, Nova Scotia (Bay of Fundy)
- Shoot date: August 1, 2015
How I Rendered the Sunset Time Lapse
To create the video, I used GoPro Studio. Their free software is very easy to use.
Because I started with a battery at half capacity, I had to change the battery during the shoot – and it caused the angle/orientation to be off. You will notice this in the video and I talk more about it below.
- Playback rate: 60 frames/second
- Edited with: GoPro Studio
- Gear: GoPro Hero4 Black, Gorillapod SLR, Wasabi batteries
In the video below, the first 12 seconds are played back at 3X faster (180 frames/sec) than the rest of the video.
I then replay the video at standard (60 frames/sec) speed. This frame rate is overkill. See the end of the post for what I learned from this shoot.

What I Learned From This Shoot
I learned four lessons from this shoot:
- From a previous time-lapse, I learned that I need to shoot at a higher frame rate (it was at one image every 5 seconds). I went too far the other way on this shoot and shot one image every 0.5 seconds – or ten times as many images. This was too many for a sunset time lapse. I plan on shooting the next sunset time lapse at a rate of one image every 1 or 2 seconds.
- I set up in a traffic area. Because of this, I had to crop the bottom half of the video because of the number of close-up people walking by. (And I think there was a little intentional photobombing.) My next sunset time-lapse will be set up in a not-so-visible area and with less up-close activity.
- I’m going to start each shoot with a fresh battery. As you might notice in the video, the camera angle changes slightly. This is because I had to change the battery and I accidentally adjusted the angle. While I was able to fix it (mostly) it is still a distracting element. Because they last longer than the standard GoPro batteries, I use Wasabi brand. They also cost much less.
- I wish I had let the sky go completely dark before stopping the time-lapse. I think the dramatic change from bright sun to darkness would have been more dramatic.
Watch for the sweeping sun along the cliffs at 0:16. Want more? Here are 10 Bay of Fundy timelapse videos.
How to Shoot a GoPro Driving Time Lapse
In this post, I share the five steps to shoot your driving time-lapse and the four settings to create your driving time lapse.
But first, here’s the finished product:
How to Create a Cloud Timelapse Video (Ecuador)
In this section, I’ll share the specific settings I used to create a cloud timelapse video in Ecuador’s Andes mountains.
Check out the tutorial below.
But first, here’s the final product:
This was shot from our apartment in Santa Isabel, Yunguilla Valley (located 90 minutes from the city of Cuenca).
When I shot this, we were making plans to return to Canada. And we didn’t want to forget what our back deck view had been for three years.
But first, here is the final product:
Settings to Create a Cloud Timelapse Video
Here are the settings I used to shoot this cloud timelapse.
- Shot 1 image every 5 seconds with my GoPro Hero3 Silver
- Resolution: 11 MP
- 3744 Images / 16.4 GB
- Length of shoot: Just over 5 hours
- Shoot Date: February 1, 2015
- Location: Yunguilla Valley, Ecuador. Located 90 minutes from the city of Cuenca
- Edited with: GoPro Studio (free software by GoPro)
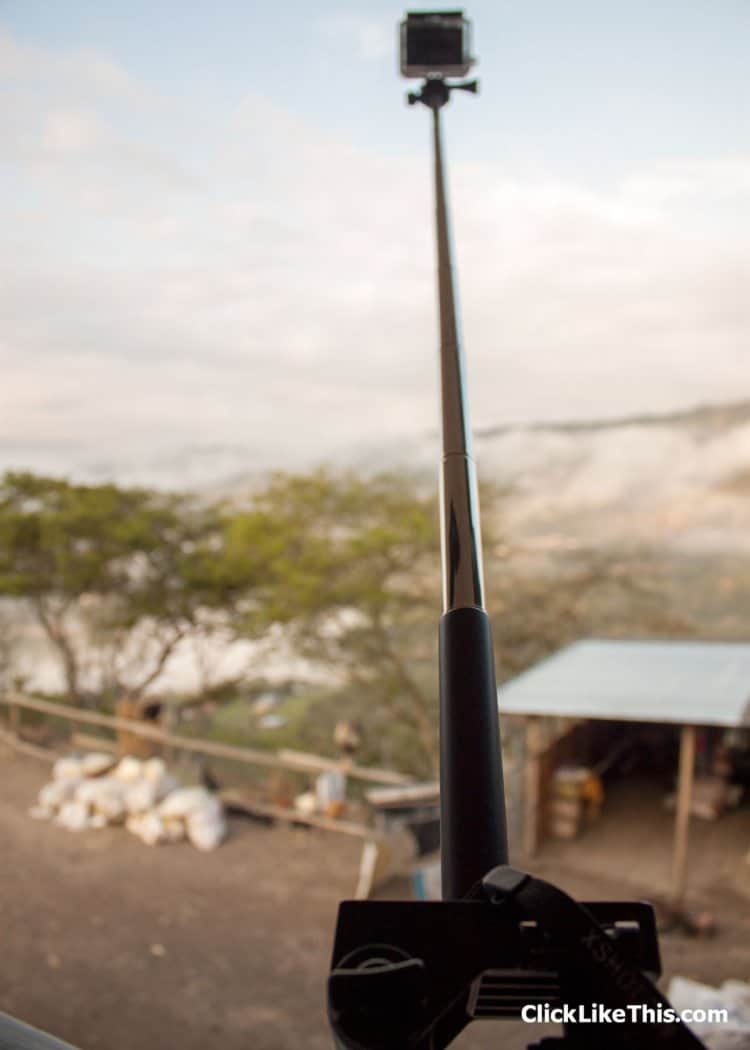
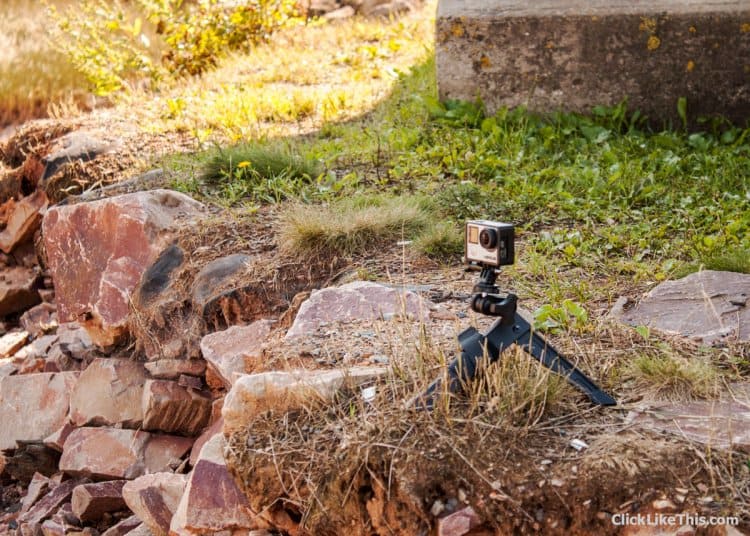
- Camera mount: This was one of my more bizarre ones. I mounted the GoPro on the end of a three-foot extend pole and then mounted that to a full-size tripod (see image below). Since the camera has such a wide-angle view, and I was shooting from my back deck, I wanted to put the camera past those distracting elements and capture just the cloud movement. Not only did that not work, but the wind also moved the camera and affected the image quality. Live and learn…
See post-production details below the image.
Post Production: Create a Cloud Time Lapse
The first thing I did was delete the spoiled frames from battery changes and distracting elements.
Inside GoPro Studio, I imported all the images and created a video at 48 fps. When I played this back, it was too boring. The clouds didn’t seem to move fast enough. I then boosted the playback rate by 50% (the software shows it at 150%) which created an effective 72fps.
Since I was shooting 12 images/ minute, this means that each hour of cloud movement was reduced to 10 seconds of video.
While GoPro Studio is no longer available, there are still lots of great GoPro video editors to choose from.
What I Learned From This Project
I learned two lessons from this cloud timelapse project:
- The biggest flaw with this time-lapse is that the camera wasn’t steady. As mentioned above, I had the GoPro on the end of a 3′ extend pole that was mounted on a full-size tripod. The wind easily moved the camera, causing a shake and some distracting movement.
- For longer shoots, I can shoot fewer images and then reduce the playback frame rate. The final product will be the same and I’ll need fewer images. For example, for my next cloud time-lapse, I think I’ll try shooting a frame rate of 1 image/ 10 seconds (6/min) with a rendering frame rate of 30fps.
For context, here is a still shot of the valley.
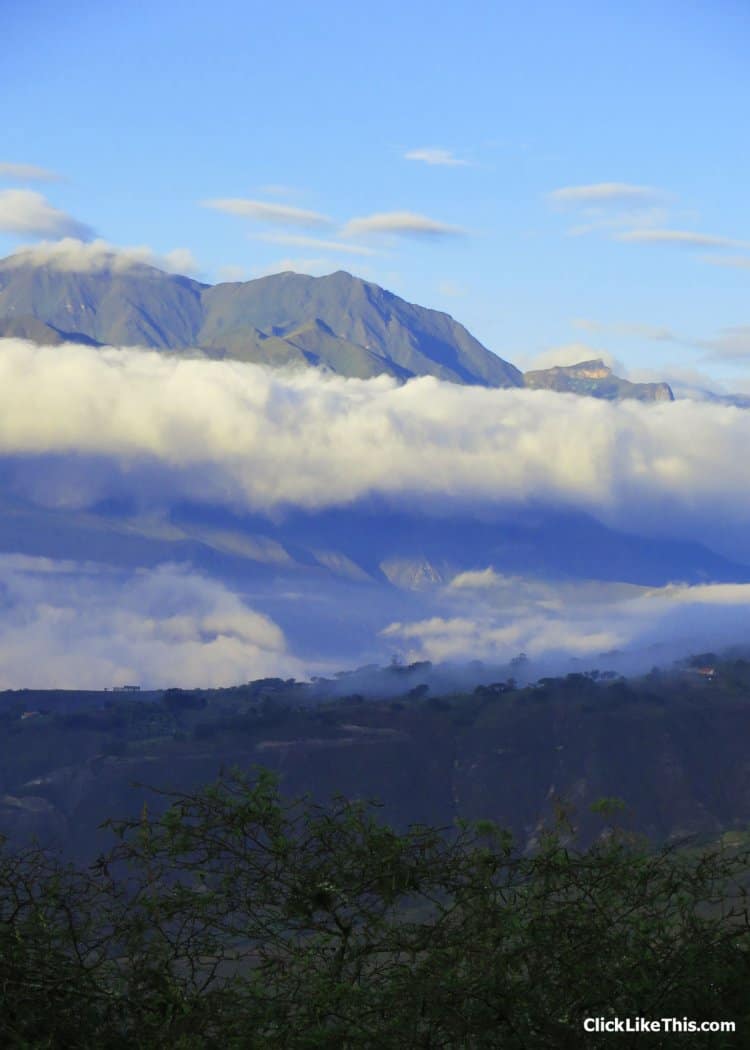
I’m pretty happy to have this video. We watched this cloud activity every day for three years – and now we’ll never forget what it looked like.
Create GoPro Tide Timelapse Video (Bay of Fundy)
Learn how to shoot a tide timelapse video with your GoPro camera. This video was shot in Wolfville, Nova Scotia.
Check out the tutorial below.
But first, here’s the final product:
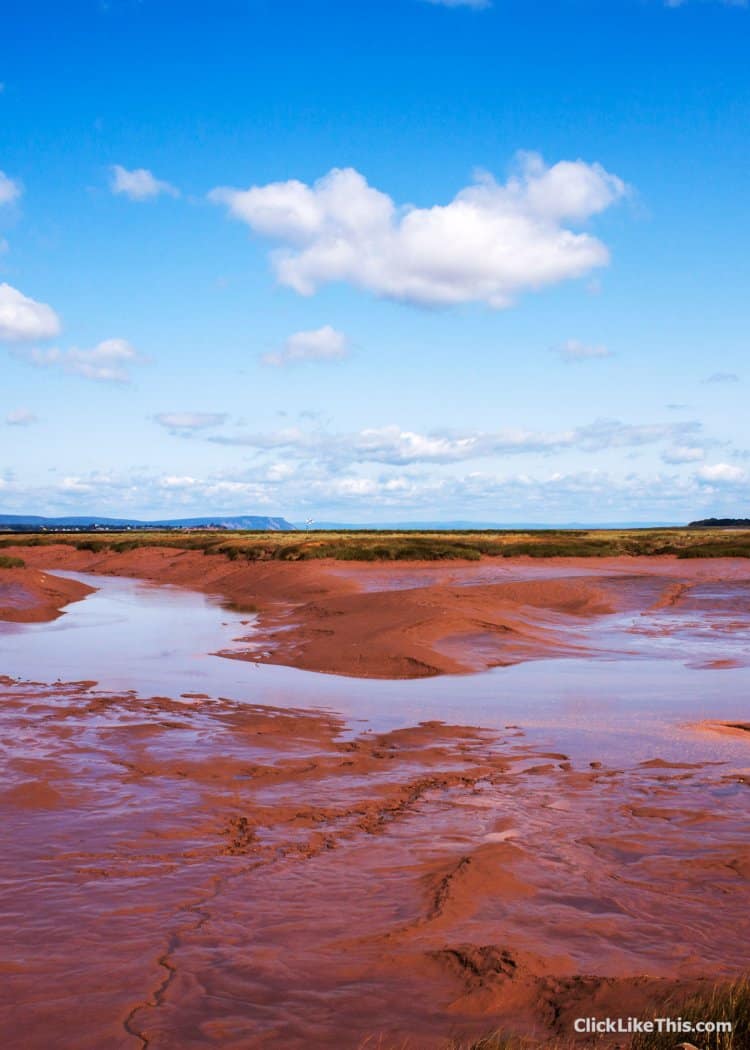
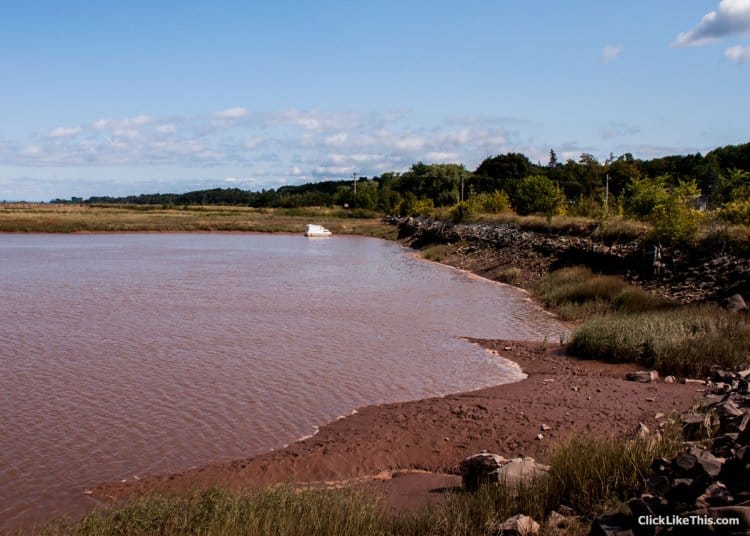
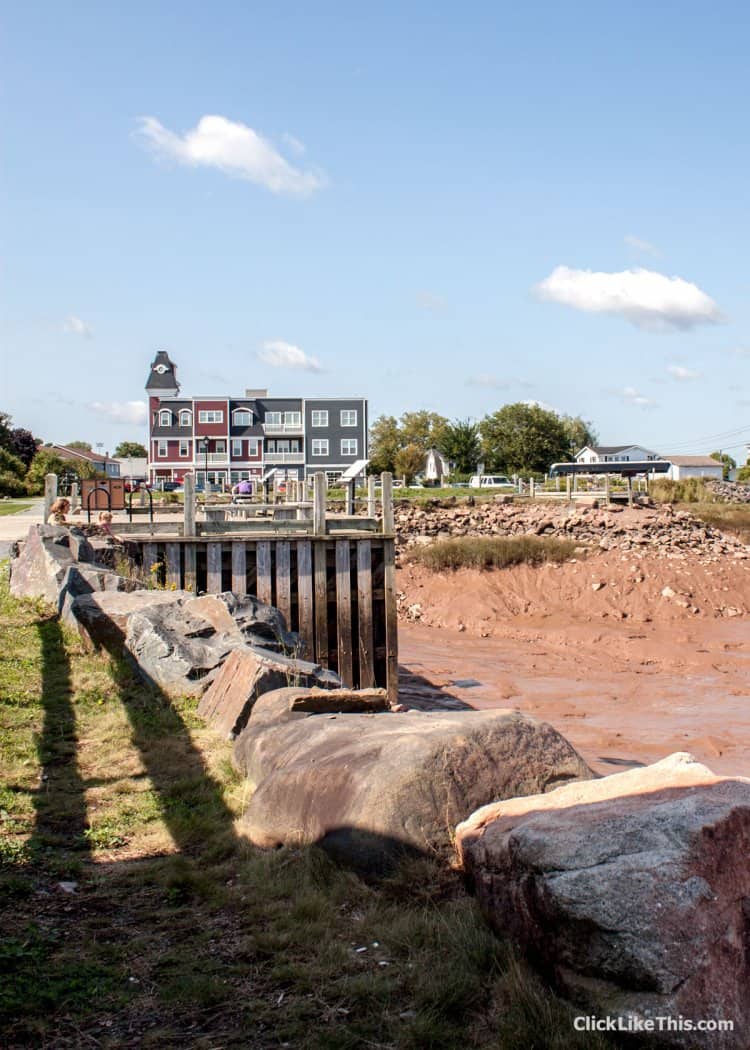
A few weeks ago, we happened upon low tide in Wolfville, Nova Scotia. The small basin in front of Waterfront Park was completely empty. It looked like a giant, empty mud puddle.
We set up the GoPro and started shooting. Over the next 80 minutes, the basin completely filled with the tidal waters of the Bay of Fundy.
In the following video, I explain the whole process. Below the video, I share all the specs and settings used in this shoot.
How to Create a GoPro Tide Time Lapse Video
How I Created This GoPro Tide Time Lapse
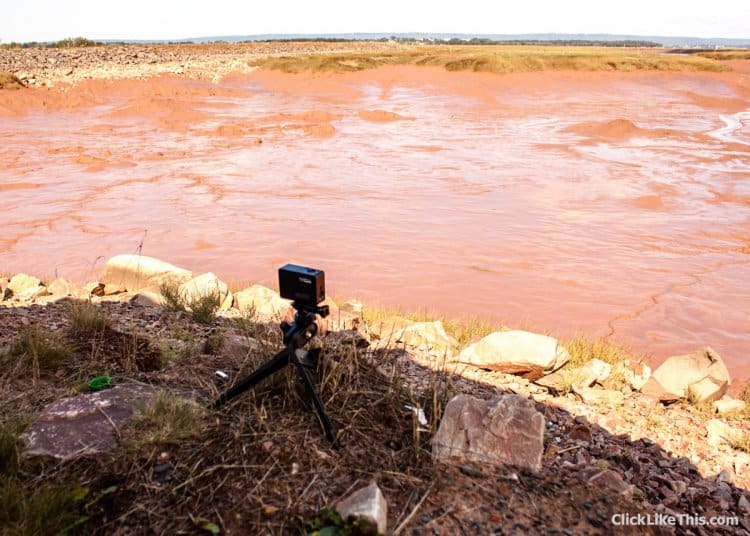
![]() I set up the camera on the UltraPod mount. It is stable and low to the ground.
I set up the camera on the UltraPod mount. It is stable and low to the ground.
As you can see in the following images, I have the camera in an open (non-waterproof) mount. With this mount, I can connect an external power source. I did this because the battery wasn’t 100% – and I didn’t know how long it would take to fill the basin.
In the end, it didn’t matter. My Wasabi battery lasted the full 81 minutes and still had charge left.
Settings Used to Create the GoPro Tide Time Lapse
- Camera settings: 1 image every 2 seconds (30 images/minute) at 7MP resolution.
- Total shoot time: 81 minutes. Total of 2430 still images.
- Location: Reservoir Park, Wolfville, Nova Scotia, Canada. Shot in front of the gazebo.
- Gear Used: GoPro Hero4 Black camera, Pedco UltraPod II tripod, Wasabi battery.
- To render the video, I used GoPro Studio. In GoPro Studio, I rendered the video at 2 speeds. The fast speed was rendered at 150 frames per second (fps) and the slower speed at 60 fps.
What I Learned From This Shoot
Overall, I’m happy with the final product. Here’s what I learned from this time-lapse shoot:
- I can reduce the time-lapse interval for shooting slow-moving clouds and water. For my next shoot, I’ll use 5 frames per second.
- I think it would have been more dramatic to mount the camera higher and angled down. The camera was set up just a couple of meters above the high-water mark, making the water appear to be almost on the same level. If I had mounted it higher, I could have cut out more sky and shown the dramatic rise in water level.
- The music I chose was too short. At 0:59 in the final video, the music stopped and then restarted. It felt like the video must be over, but it had another 13 seconds to go. I should have either chosen the correct length or blended the two clips together better. (Update Nov. 12, 2015: To fix the weird music edit, I just replaced my audio track with one on YouTube – without having to render and upload a new video. Such a time saver!)
To give some context to the shoot, here are a couple of images from the park in Wolfville, Nova Scotia.
Your Turn
What is your favorite setting or mount for shooting time-lapse video? What’s your question about creating a GoPro time-lapse video?
Pandu Aji
Thursday 13th of June 2019
Hi, I am using Go Pro Hero 4 SE. I can't found resolution settings on video lapse menu, but i only can use it on timelapse menu.
Jeff
Monday 13th of May 2019
I’ve been asked to shoot a time lapse video of a stage being built (8 hrs) with a GoPro camera... I don’t know what model GoPro I’m using yet ... for an 8 hrs time lapse video what settings should I use ? Power? Card? Thank you
Bryan Haines
Tuesday 14th of May 2019
You'll want to power the camera with a powerbank or direct connect to a laptop. The in-camera battery won't last much more than 1 hour each.
For memory card, larger is usually better. The minimum size needed depends on many factors - shooting resolution, interval, etc. Without knowing your objective of the time lapse, it's hard to know the best settings.
Randy
Wednesday 10th of April 2019
Shooting a house construction over the course of the day using two Hero 3s. Probably no power available, so will need a power bank I assume. Recommendation on card size to shoot over the course of a day? Any other suggestions? Thanks.