In this post, you’ll learn some great GoPro tips and tricks for beginners.

GoPro Tips and Tricks for Beginners
Here’s what we’ll cover in the post:
- Use Red Filters for Better Underwater Photography
- Create Rotating Time Lapse Videos with a Kitchen Timer
- Buy Just One Mount
- Underwater Shooting Setting
- High Frame Rates Require Good Lighting
- Use the GoPro App For Social Sharing and Better Composition
- Shoot at 24 FPS in Low Light Settings
- In Low Light Settings, Shoot Close to the Nearest Light Source
- Understand Your GoPro’s Resolution and Field of View
- 3 Tips to Manage Your GoPro Batteries
- Use a Gimbal for Smoother Shots
- Shoot in the Highest Resolution Possible
- Use GoPro Edit Templates for Fast Video Editing
- Eliminate GoPro Lens Fog
- How to Shoot a Drive-lapse Video
- How to Shoot a Sunset Time lapse Video
16 GoPro Tips and Tricks (for Beginners)
In this post, you’ll hear from 11 GoPro photographers. They are travel bloggers, tour operators, hand boarders, and professional content creators.
Have a tip to share? Join us in the comments below!
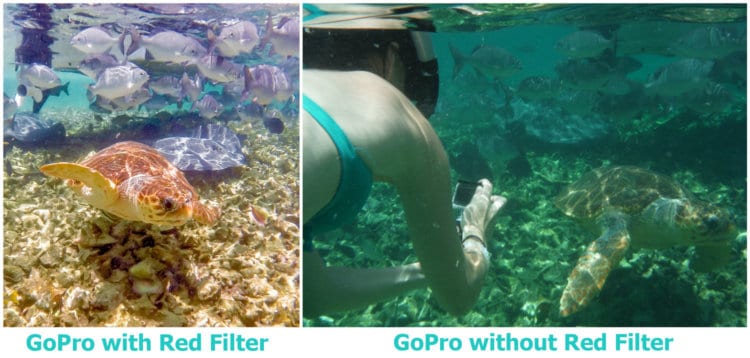
1. Use Red Filters for Better Underwater Photography

![]() GoPro Photographer Bio: Ashley of My Wanderlusty Life is a travel blogger based in Boston, Massachusetts.
GoPro Photographer Bio: Ashley of My Wanderlusty Life is a travel blogger based in Boston, Massachusetts.
One thing I wish I knew from the start was the need for red snorkel filters for better underwater photography.
Without them, what happens under the water is almost indistinguishable as it’s all just a blue-green mass.
See price of GoPro red filters
With the snorkel and diving filters (the shade of red depends on your depth) what you see on camera is just how you see it with your eyes: vibrant, natural colors as if the water is crystal clear.
Here’s a post full of underwater photography (with a GoPro video at the end): Snorkeling in Belize
2. Create Rotating Time Lapse Videos with a Kitchen Timer

![]() GoPro Photographer Bio: Josh Summers is a Texan living in Xinjiang, China with his wife and son. He blogs at Far West China.
GoPro Photographer Bio: Josh Summers is a Texan living in Xinjiang, China with his wife and son. He blogs at Far West China.
One of the best accessories I ever bought for my GoPro is a simple kitchen timer, the kind that you spin to get started.
Put a sticky mount to the timer, set the GoPro to timelapse mode and then spin to get going.
The motion adds a beautiful new dimension to time-lapse shots and best of all, the egg timer usually only costs less than $10!
Or you could pick up the Camalapse – it comes with a tripod mount (top and bottom). A full 360-degree rotation takes 60 minutes.

3-4. Buy Just One Mount, Underwater Shooting Setting
![]() GoPro Photographer Bio: Avichai Ben Tzur is based in Tel Aviv. He’s the publisher of X Days In Y, a travel website offering in depth travel guides to popular and exotic destinations around the world.
GoPro Photographer Bio: Avichai Ben Tzur is based in Tel Aviv. He’s the publisher of X Days In Y, a travel website offering in depth travel guides to popular and exotic destinations around the world.
I recently returned from a 6 month trip to the remote South Pacific Islands, the primary reason for buying a Hero 4 Silver.
I was mostly looking for a way to capture the underwater scenery (see following video), but ended up using the camera to take time lapse videos over volcanoes and from mountaintops (see video below).
See price of GoPro red filters
My main reason for getting a Hero4 Silver was to take underwater shots when diving and snorkeling.
If this is your case as well, I highly recommend getting a red filter for the lens. It compensates for the color distortion in salt water and leads to beautifully clear shots that depict the true underwater colors.
Read more: How to use a GoPro underwater
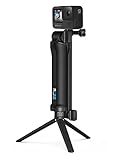
![]() 3. Buy Just One Mount (GoPro’s 3-Way): When starting out, it’s very tempting to purchase a lot of accessories.
3. Buy Just One Mount (GoPro’s 3-Way): When starting out, it’s very tempting to purchase a lot of accessories.
Unless you’ll be skydiving, my advice would be simply to buy GoPro’s 3-in-1 mount which can be used as a camera grip, extension arm or tripod.
It covers the most popular necessities such as selfies, underwater photography and beautiful night shots/time lapse videos using the tripod.
4. Shoot Underwater Photos in Time Lapse Mode (2 seconds): When you’re using a GoPro to take underwater shots (not videos), set the camera to take multiple shots in short intervals.
Hero4 Silver Tip: my recommendation is 2 seconds which still allows for screen display so you can see what you’re shooting
Remember: you must be pretty much completely still for the shot to come out clearly so taking a few consecutive shots increase the chances of that happening.
5. High Frame Rates Require Good Lighting
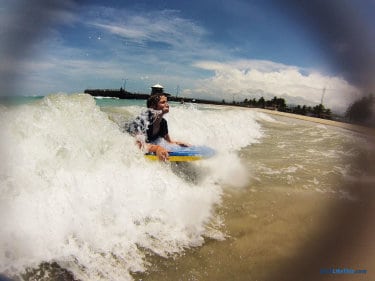
GoPro Photographer Bio: Michelle Michalak is a handboarder based in San Diego and represents the Slyde Handboards Team across social media.
I wish I knew how important lighting was when using GoPro.
Tip: Lighting is key for not only your quality, but your frame rate. If you want to shoot a high frame rate, like 120 or 240 frames per second, you absolutely need good lighting.
Read more about GoPro settings.
Here are some on-camera settings for using your GoPro in the water.
6. Use the GoPro App For Social Sharing
GoPro Photographer Bio: Patryk is a digital nomad currently in Prague, Czech Republic and blogs with his wife at karolinapatryk.com
I wish I knew that GoPro is so easily managed by phone. It (GoPro Hero4 Black) doesn’t have a screen, so it was really challenging for me to take a photo at the beginning.
Now, thanks to GoPro app, I can see the full landscape before taking a picture. I can also download it on my phone and post in on Facebook or Instagram right away!
Improve Composition with the GoPro App
GoPro Photographer Bio: Tanbay is a luxury travel blogger at travellingweasels.com.
My tip is for all GoPros without a screen (we use the 3+): Use the app to connect to your GoPro so you can see what you’re filming.
This might be obvious to some, but it can make a difference depending on what you are filming.
See some of my work in this video.
7-8. Shooting in Low Light Settings
This tip is thanks to Julie Evans on behalf of ProEditors – the video editing solution that transforms raw point-of-view camera footage into professionally edited movies that are easily shared with friends.
7. Shoot at 24 FPS in Low Light Settings If you’re shooting in a low light setting, set your frame rate to 24 FPS (frames per second).
This will allow more light to reach your camera’s sensor. The lower the number, the better your camera will perform in low light.
8. Shoot Close to the Nearest Light Source If there is no significant light source nearby, use a flashlight (your phone might even do) to improve the lighting.
9. Understand Your GoPro’s Resolution and Field of View
GoPro Photographer Bio: Dylan runs a San Francisco tour agency called Orange Sky Adventures. He uses a GoPro Hero 3+ for the majority of their web shots.
For new GoPro users, I would recommend learning the difference between 1080, 2.7k, and 4K, and knowing how each setting affects your shot. Narrow, Wide, and SuperView angles are equally important.
Basically, when a shot comes up in the field – whether it’s a bug up-close or a sunset in the distance – you need to know which setting works best.
Nothing is worse than recording an awesome clip, only to see it’s not-so-awesome in replay. To learn, you can watch YouTube tutorials, or better yet, practice in real life. You’ll be a pro in no time.
Here’s a vid we’re soon to drop. It’s shot entirely with GoPro 3+.
10-12. Managing GoPro Batteries, Gimbal, Resolution Settings
GoPro Photographer Bio: Ryan runs HD Carolina an agency that films things to see and do in the Carolinas. His suggestions are based on the Hero4.
We use the GoPro for a lot of the filming we do for our episodes about things to see and do in the Carolinas:
10. Managing GoPro Batteries
![]() Battery life can be the difference between getting a shot and not getting a shot. Especially when you are on long treks and won’t be near power for an extended period.
Battery life can be the difference between getting a shot and not getting a shot. Especially when you are on long treks and won’t be near power for an extended period.
For this, I recommend the following:
- Be mindful of keeping things like WiFi on when you don’t need it as this will constantly drain the battery.
- Get extra batteries and keep them handy as your GoPro is useless without a charge.
- I also carry a large external USB charger in my bag so that I can charge things from that as well.
Here’s how to extend battery life.
11. Use a Gimbal for Smoother Shots
![]() I also recommend, when possible, using a gimbal. It is an extra cost but they really help in creating smooth shots when they can be used.
I also recommend, when possible, using a gimbal. It is an extra cost but they really help in creating smooth shots when they can be used.
There are several out on the market that vary in price. For GoPro, the obvious choice is their gimbal – the Karma Grip.
12. Shoot in the Highest Resolution Possible
Always film in the highest resolution possible (4k for the Hero 4).
You can always reduce it down in post-processing and if you don’t use a gimbal, you can use the extra resolution to software stabilize a shot if you are reducing it down to a lower resolution (e.g., 4k to HD).
Learn how to improve your GoPro photography.
13. Use GoPro Edit Templates for Fast Video Editing
GoPro Photographer Bio: Dena is half of the team here at Storyteller Tech where we blog all about how to use your GoPro.
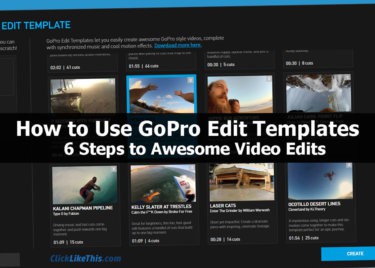
It’s so easy to shoot hours of GoPro footage – but it can be pretty overwhelming to sort through it all and create a compelling edit of all your clips.
The templates are free and are used inside of GoPro Studio (also free).
Just choose the template you like and insert your clips. It’s super easy.
And here’s an example of a video I created – in just a few minutes – using a template.
14-16. Eliminate Lens Fog, Shoot a Drive-lapse and Sunset Time lapse
GoPro Photographer Bio: This tip is mine (Bryan). I’m the other half of the Storyteller Tech team.
14. Eliminate GoPro Lens Fog with Anti-Fog Inserts
Even with a waterproof case, you still have to worry about moisture.
Humidity inside the case can condense and cause photo-ruining fog.
It’s pretty easy to fix. Drop in a couple of anti-fog inserts, and you’ll eliminate GoPro lens fog.
You can get these inserts from GoPro or another company. I’ve been using CamKix inserts for a couple of years – with great success.
15. How to Create a GoPro Driving Timelapse
I’m a pretty big fan of time-lapse videos. Just a few months before we moved back to Canada from Ecuador, I shot a driving time-lapse video in Cuenca.
Here are the settings I used to compress 2 hours into 7.5 minutes.

 Camera settings: I shot one image per second (60 images/minute) at 5MP resolution.
- Choose a great location: We were first to board the bus and chose the front seats on the upper level of the double-decker bus. I mounted the camera on the front of the bus, centered horizontally. I aimed the camera straight ahead, with a slight downward angle. Because it was at the front of the bus, there were no distracting people walking by.
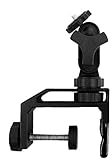
- Gear Used: GoPro Hero3 Silver mounted on a Pedco Ultra Clamp. I used two batteries (Wasabi) during this shoot. The first lasted about 80 minutes. The second finished out the final 30 minutes of the tour.
- Mount the camera securely: To keep the camera steady, I rely on my Ultra Clamp mount. Read my Ultra Clamp review.
- Watch the battery: Don’t worry about sticking your head into the occasional image. It’s better to delete a few images than run out of battery and not realize it. It is easy to remove a few spoiled images – and it won’t affect the final product at all. I changed the battery while the bus stopped at a look-off point over the city.
See the full post with all my specs.
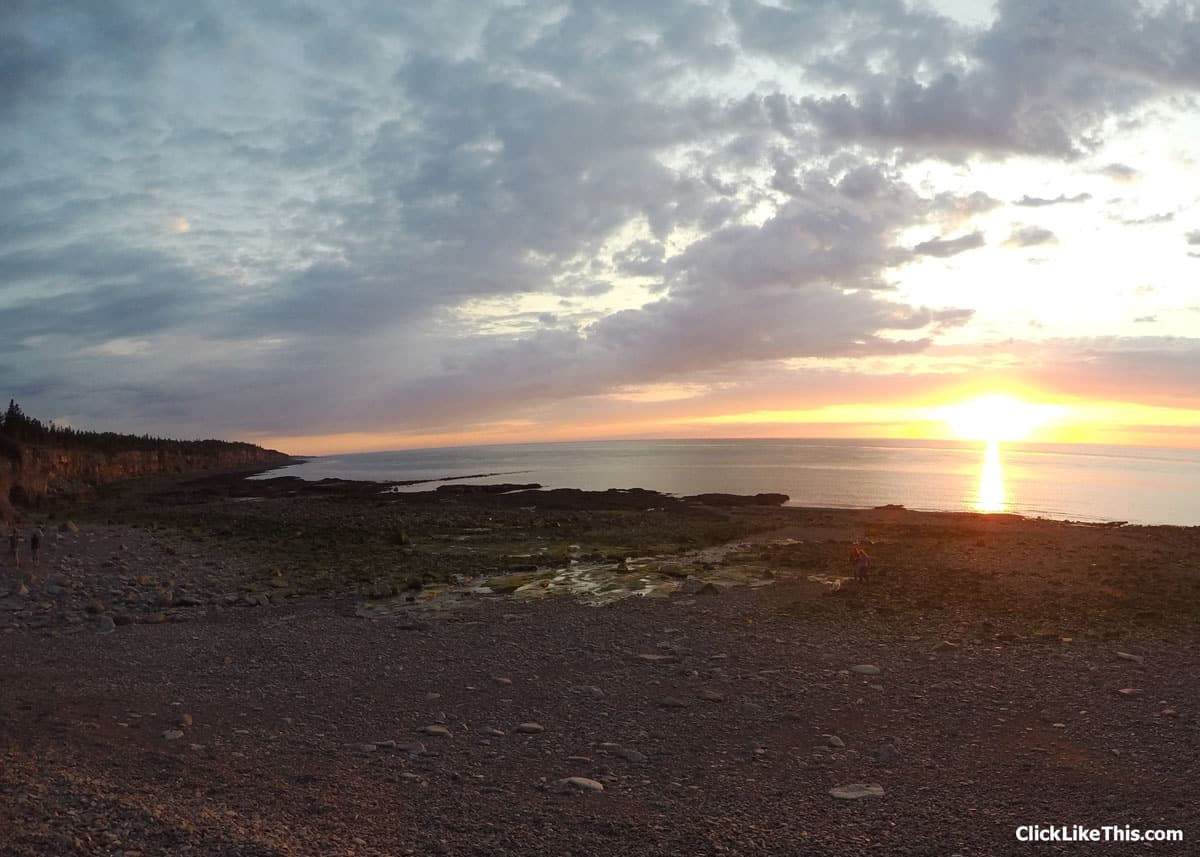
16. How to Create a GoPro Sunset Timelapse
After I created my first sunset time-lapse video (Isabela Island, Galapagos), I fell in love with them. They capture the moment like nothing else.
To create a sunset time-lapse video, you’ll need four things:
- A steady tripod. I favor the Gorillapod SLR. It is stable enough for a heavy DSLR – so it doesn’t budge with a GoPro.
- A GoPro camera Any version will work. This video was shot with the Hero4 Black.
- Charged batteries. You should bring an extra one or two. This was shot with Wasabi batteries.
- A great location. It’s hard to beat the Bay of Fundy (Nova Scotia) for a sunset. Morden is a family favorite. We shot this footage while having a fire on the beach. You can see the occasional puff of smoke drift across the video (from left to right).
Check out the full post with all the specs. Here’s the final product:
And there you have it: 16 beginner GoPro tips.
Your Turn
Are you struggling with your GoPro? Ask your question below. Have a tip or trick? We would love to hear it!
- About the Author
- Latest Posts
Hey, I’m Bryan! I’m a content creator and co-founder of Storyteller Tech.
Experienced GoPro Videographer: I’ve been shooting with GoPro cameras for over 11 years. My first GoPro was the Hero3 Silver, bought for a Galapagos work trip in 2012. Today I own 20+ action cameras, including GoPro, DJI, and Insta360 cameras.
Professional Creator: Dena and I have developed video and content marketing plans for numerous international travel brands. And we also run several content businesses.
Bryan also creates at Storyteller.Travel and is co-founder of Storyteller Media, a Canadian-based publishing company.
Mike
Sunday 29th of March 2020
I have to disagree with #12, and I don't think you should shoot in the highest resolution possible, especially if the user is a beginner. I believe new users, mainly the ones that aren't as familiar with editing their videos. Also, generally, these new users may not even have a computer that can even edit these higher resolution files. I often have new users shoot their first videos in 2.7k at most or even just 1080p. These days most people are sharing with social media 2.7k videos are perfect for downloading to a smartphone and then sharing. Other than that one, it's a great list of tips.
Bryan Haines
Tuesday 12th of May 2020
I see your point. Resolution requirements depend much on what the purpose of the video is. While higher resolution videos take more space and processing capabilities - they are also more forgiving should you need to crop during post production.
Mike
Sunday 1st of March 2020
Great content all good stuff for beginner GoPro users. The one big thing I try to get new users to do is just plain use their camera. Too many users think they can buy a GoPro before a trip to Hawaii and come back with amazing videos of their vacation. My #1 tip is to use your camera.
Sonam
Thursday 27th of June 2019
Bryan, I would call this a wonderful piece of content. This article will definitely help beginners who are struggling with Gopro. Thanks for the share. Cheers, Sonam
Joe
Monday 27th of May 2019
I have a GoPro Hero 2. Can someone tell me how to set the video so that all my recording doesn't have that jerky freeze frame type of quality? It's no where near smooth. Makes for crappy videos on the bike when it's jerky.
Tonya Rose
Saturday 15th of April 2017
Incredible guide, and very helpful tips! I got recently my first GoPro camera, and I've seen so many cool GoPro videos on youtube but mine weren't at all that good. I needed some more shooting tips, and this really helps. Thank you!